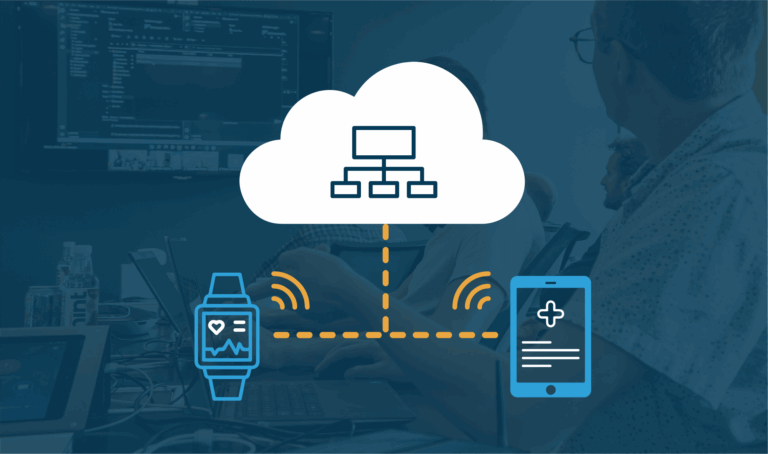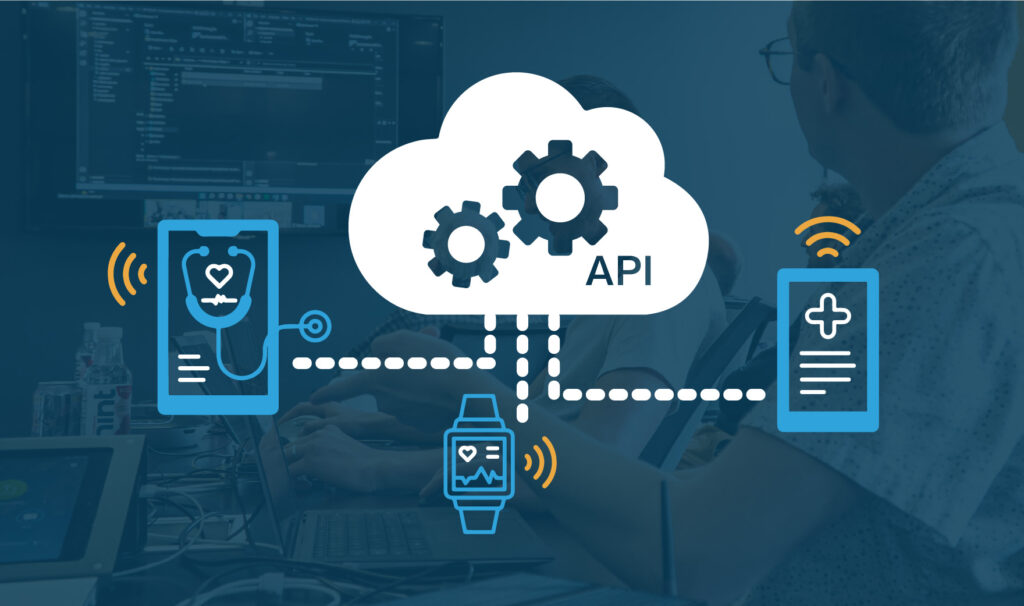
As more and more people embrace connected medical devices, there’s a growing need for robust, connected ecosystems to support these innovative solutions. A medical web API or an app plays a crucial role in this ecosystem, acting as the glue that holds everything together. It allows devices, healthcare providers, and patients to communicate and share data seamlessly. However, creating such a system is incredibly complex, and with that complexity comes some pretty big challenges, especially when keeping data secure and protecting patient safety and privacy.
Several reasons for this complexity include the need to accommodate existing interoperability standards, manage legacy implementations, and handle the sensitive nature of the data involved. Connected medical devices often deal with Protected Health Information (PHI), which is subject to stringent laws and regulations, such as HIPAA. Ensuring compliance with these regulations adds another layer of complexity to the already challenging task of securing and managing access to APIs and apps within these ecosystems.
What’s In This Guide
In this article, we’ll provide a high-level blueprint for creating a robust medical web API or app. Drawing on over 15 years of cloud architecture experience, we’ll cover the basics that simplify development, ease maintenance, and ensure operational excellence. We’ll share insights and best practices to help you navigate the complexities and avoid common pitfalls while building a high-quality solution.
At Punch Through, we’ve seen firsthand the competitive advantages and risk reduction of building a solid foundation. We want to stress the importance of getting it right from the start, and we hope to impart some of that foundational knowledge to you. If you or your team find yourself hitting blockers, our cloud team is here to help.
So, let’s dive in and establish a blueprint for a secure and reliable medical web API or app.
Establishing a Medical Web API or App Blueprint
Constructing a medical web API or app is similar to laying down a foundation for a building. Just as a sturdy base supports a house through critical infrastructure like electricity and water, a well-designed foundational layer for your API provides essential capabilities. This foundation supports future growth and adaptability for the entire application.
Our blueprint for developing high-quality, secure web API and app includes the following foundational elements:
- Secure API Implementation Infrastructure
This cornerstone ensures secure exchanges between mobile apps or medical devices, maintaining data integrity and confidentiality. - Developer-Friendly Tooling
We provide a selection of tools designed to enhance the developer experience, making the development process more efficient and less prone to errors. - Automated Testing
Our commitment to quality is reflected in our rigorous automated testing, ensuring our code meets the highest standards. - Continuous Integration / Continuous Deployment (CI/CD)
Our CI/CD framework guarantees that our code is high quality and adheres to our stringent guidelines, facilitated by automated tests and lint checks. - Observability Tools
We employ essential tools and practices that allow us to monitor and debug issues effectively from development through production. - Documentation Templates
Our starter templates ensure that we capture key information right from the start of developing our medical web API or app.

Let’s explore each component and its role in the overall architecture. This will show how each element contributes to a web API or app’s stability, security, and performance. In the following sections, we’ll discuss each component’s implementation and best practices.
Medical Web API Implementation Infrastructure
Understanding the critical implementation infrastructure of a medical web API is paramount to building a solid foundation. By examining core aspects such as authentication, authorization, versioning, documentation, data modeling, and application configuration, you’ll gain insights into the fundamental elements necessary for creating secure, scalable, and maintainable web APIs. This section will summarize each core component and highlight our preferred approaches, tools, and libraries.
Authentication
Security is top-of-mind when working on web-based medical APIs and apps. We like to use proven libraries to power any security-related functionality, such as authentication. Using OAuth 2.0’s Authorization Code flow with PCKE (pronounced pixie) allows users in a mobile app or single page app to authenticate securely with a web-based API.
PCKE is an extension to OAuth 2 that helps prevent CSRF (cross-site request forgery) attacks. Using a proven library means you don’t have to spend valuable engineering time implementing the authentication flow or worry about introducing a security bug.
Some libraries we prefer and trust:
- For Python
- For C#/.Net
You can even use a service like Okta, Auth0, AWS Cognito, or Azure AD B2C to provide the OAuth server along with a user management interface. Migrating authentication between the different options can be annoying and tedious, so try to choose the type that best fits your near-future needs.
Web Application Login
Implementing a secure and user-friendly login system is vital for all web application authentication. Here, we’ll cover best practices for implementing login functionality, handling password resets, and enhancing security with two-factor authentication.
Implementing Login Functionality
If your application has a web-based UI, use a library for the login screen. These libraries often include password reset and change features. We recommend using the library’s features instead of building them from scratch. This is for the same reasons we mentioned for API authentication.
Password Reset Process
A robust password reset process is important for user experience and security. When implementing password reset functionality, keep the following best practices in mind:
- Use a library or framework-provided solution to handle password reset flows.
- Send users a token via email to access the password change form rather than emailing the password directly.
- Store passwords securely in the database by using a hashing algorithm with a salt.
- During the password reset process, do not reveal whether an account exists for a given email address to prevent potential attackers from enumerating valid user accounts.
Two-Factor Authentication
Consider using a library to build in Two-factor Authentication (2FA) support from the start. Many of the services listed above in the API authentication section also support two-factor authentication. This will be especially critical if you have an admin-type interface that allows a small number of super users to see and edit sensitive information in your application.
The benefits of implementing two-factor authentication include:
- Enhanced security by making it more difficult for attackers to gain unauthorized access, even if they obtain a user’s password.
- Reduced risk of account takeovers, especially for high-value targets like admin accounts.
- Increased user trust and confidence in the security of your application.
Services like Okta and Auth0 provide easy-to-integrate solutions for implementing 2FA in your web application. If you are already using a single sign-on service, like Google Workspace or Microsoft Entra, for your organization’s employees, you should be able to use their sign-on system and libraries to enforce 2FA for those employees.
By leveraging proven libraries, following best practices for password reset processes, and incorporating two-factor authentication, you can build a robust login system that provides a strong foundation for your web application’s security.
Authorization
With authentication in place, your application knows who is logged in. Now, you must ensure the user is allowed to access the requested resource or action. Authorization is crucial, especially in medical device APIs.
Setting Default Authorization Requirements
Its important to ensure we have the right authorization in place. To achieve this, we set a default authorization requirement that applies to all API endpoints by default. This can be adjusted per endpoint as needed. For example, all API requests should require a valid logged-in user, except for the authentication endpoint. Setting a default reduces the risk of new endpoints with no authorization slipping in.
Creating Authorization Helpers
Another technique we like to use is to create a set of authorization helpers that can ensure consistent and correct authorization implementation across your API endpoints. These helpers should encapsulate common authorization scenarios and can be easily applied. For example, you might create a helper to check if a user has admin privileges.
Testing Authorization
Finally, we include authorization-related tests in our integration tests for each endpoint. This ensures authentication is correctly implemented for every endpoint. These tests should cover various authorization scenarios, such as unauthenticated, unauthorized, and permitted access attempts.
By incorporating authorization tests into your test suite, you can catch authorization-related bugs early and ensure the security of your API.
API Versioning
As you build out your medical web API, it is a good idea to have a plan for API versioning, ideally from the start. This is especially important when working with medical devices and mobile apps that could have old client versions calling your APIs. It is important to keep backward compatibility in mind to ensure those users who haven’t updated yet can still use your API. We recommend starting with “v1” in all API endpoint URL routes. Configure the code to support additional versions at the endpoint level for future changes that may introduce breaking changes.
For Example: /api/v1/device-data might capture data sent by the first version of the mobile app’s API client. You might then later have a new version of the device released and a new mobile app version that sends data up to the API in a different format from that device, in which case you would then use /api/v2/device-data as the URL to handle that different API contract.
Most web frameworks have API version configuration as part of their feature set, so look to see if you can take advantage of those from the start. This will help you ensure you have a way to keep old versions of the API endpoints working even while you introduce new versions that have breaking changes or support newer devices or mobile app versions.
API Documentation
Comprehensive and up-to-date API documentation is crucial for ensuring that developers can effectively understand and utilize your API. In this section, we’ll cover our recommendations for configuring and displaying API documentation, as well as strategies for keeping it current.
Configuring API Documentation
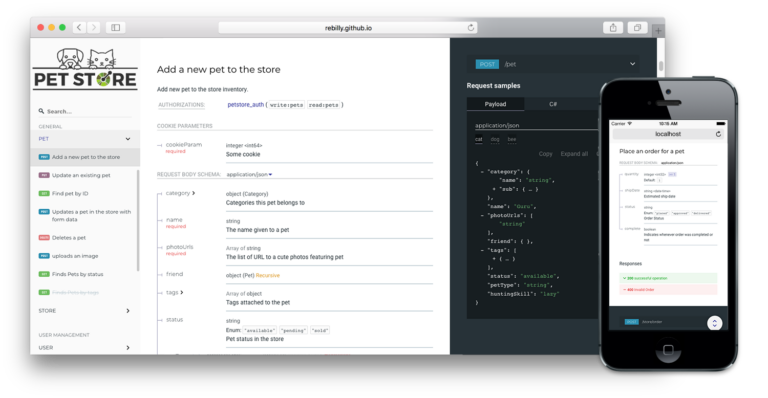
From the beginning, we recommend configuring API documentation to output an Open API spec and displaying all the API documentation via Redoc (example) or Swagger Docs (example). In particular, we like how Redoc displays an example of the JSON on the right-hand side of the screen next to the detailed description of the endpoints.
By providing comprehensive API documentation, you enable other team engineers or external developers to quickly grasp the purpose of each endpoint, how to call it, and how to handle its various responses. If your API is not public, you can restrict access to the documentation to authorized users only.

Documenting the Initial Endpoint
When documenting your first API endpoints, take extra care to set a good example for future endpoints. This includes specifying:
- Input parameters and JSON bodies
- All possible HTTP status codes that can be returned
- The structure of the responses
By clearly documenting these aspects, API callers can easily understand how to interact with your endpoints and handle the various outcomes.
Additional Documentation
In addition to the basic endpoint details, consider including supplementary documentation within the Open API spec. This can include:
- Instructions on how to call the API and the proper order of calls for multi-step process
- Link to separate HTML pages with more detailed explanations
Don’t forget to specify the authentication required on each endpoint so your users know what is required to use each endpoint.
Generating the Open API Spec
Many API libraries will have built-in functionality to specify the metadata needed for the Open API spec directly in the code. We recommend taking advantage of that to generate the spec from your code to ensure it is as up-to-date as possible. Having this place from the start helps keep documentation up to date as the API evolves. Regularly review and update the documentation whenever changes are made to the API, ensuring that it accurately reflects the current state of your endpoints.
Basic Data Model
Every web app needs at least a simple data model for users and roles. Many platforms provide a library that can get you started with a nice user model that can be saved to a database and assigned roles. We typically extend the default library-provided user model right away as we usually want to store custom attributes about the users and roles in our application or API.
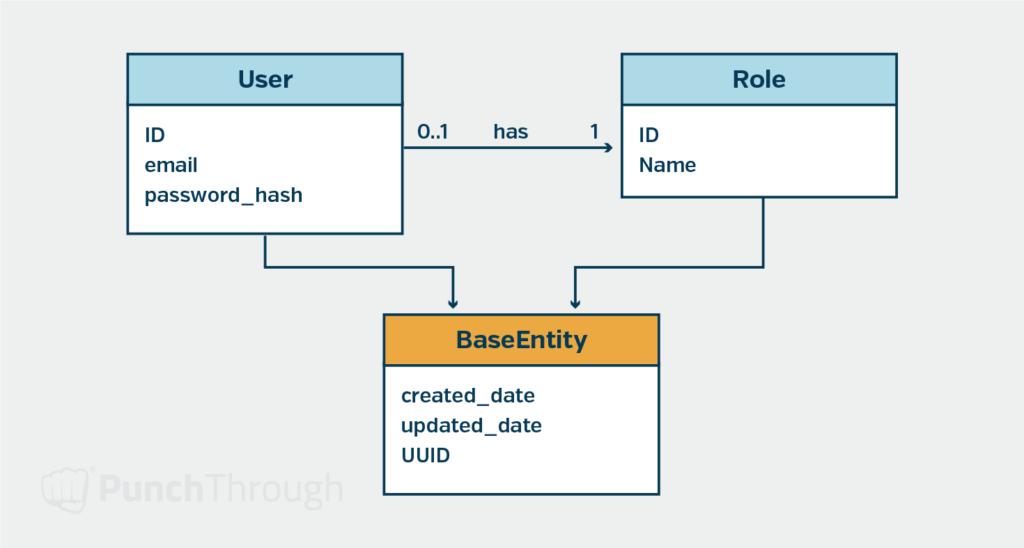
When storing dates and times in our database, we always use the UTC timezone and then format the dates in the user’s timezone when displaying them. This gives us a consistent time zone that can be easily transformed into the one the user prefers.
Application Configuration
Right from the start, we would like to set up our application to use environment variables for all configuration parameters that will be different based on the environment (local, staging, production, etc.) on which the app instance is running. This is one of the core parts of the 12-Factor App that we would like to follow. We typically will create a .env-template file with default settings for local development that doesn’t have any secrets filled in. Then, in our local run instructions, we will have the engineer make a copy of that template and fill in any secrets they need to run the app locally.
We recommend storing and managing secrets outside the code repository and using services like AWS Parameter Store (or Secrets Manager), Hashicorp Vault, or Azure Key Vault to securely handle them. This helps ensure the secrets are secure and only available to people and systems that need them.
Developer Experience Tooling
We prioritize robust tooling to streamline the development process. This section highlights our key tools and techniques for enhancing productivity and simplifying tasks like setup, testing, and dependency management.
Docker Compose
We use Docker Compose for any additional services the web app needs, such as databases, caching servers, or even mock cloud services. Docker is open-source, easy to install, and we can quickly write commands to spin up all the necessary services and run them locally for development.
Postman Collection
One handy technique we have used is to create a Postman collection with example calls to the API endpoints that developers or testers can use to try out the API running locally or even in a deployed test environment. You can generate the Postman collection from your Open API spec and customize it to help developers and testers try it out.
Commands
We like to have commands implemented and documented to install library dependencies, build the app, run the app locally, run the tests, and manage the database. These are all based on Docker Compose, so we can quickly get a new engineer up and running with a complete local development environment and help each engineer through the common tasks they will need to perform while developing the app.
Automated Tests
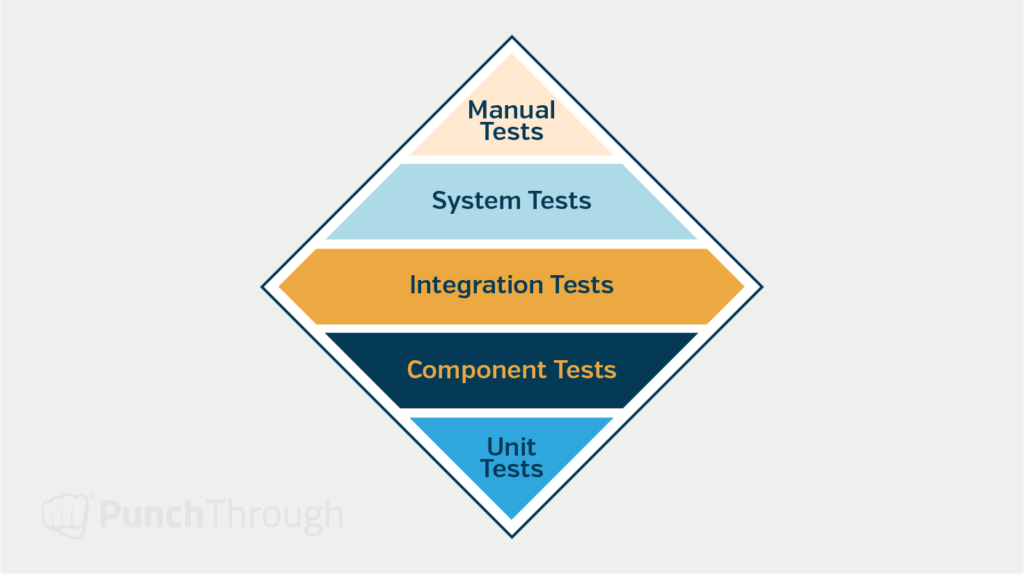
Now that we have basic medical web application and web API functionality in place, we want to set up all the infrastructure needed to implement the first set of automated tests to verify the authentication and authorization code we set up is working correctly and securely.
We start with a small number of unit tests and a more significant number of integration-style tests that simulate hitting each HTTP endpoint our API exposes. This approach typically involves setting up a test database that can run locally next to our local development database. Some web app frameworks like Django can set up this for you when you launch your tests, provided the database is already running locally or through a Docker container. We like configuring the integration tests to roll back the DB transaction at the end of each test method to clean up any DB rows created or edited during the test.
Creating the testing infrastructure and some initial tests for the base functionality will help ensure each new feature added to the web app can easily have tests developed for it right from the start. This helps ensure we can build a high-quality solution from the start and catch any bugs or breaking changes early in the development process.
Continuous Integration & Continuous Deployment (CI/CD)
Now that we have automated tests and a configurable application, we set up CI. In our CI pipeline, we run build, lint, and test commands on all pull requests to catch issues before code review. This step often helps us catch bugs and setup issues missed during local development. Some CI pipeline services we use include:
Building and Deploying Docker Images
If our CI build succeeds, we use the CI tool to build a Docker image deployable to any environment (staging, QA, production, etc.) with separate environment variables for each. Deployment can happen automatically or by manually triggering it from the CI tool’s dashboard. We set up deployment as another CI pipeline, making it repeatable and easy to monitor. Many Platform-as-a-Service offerings simplify configuring these deployments. We have succeeded with Render.com and Heroku in this space, as you can easily trigger a deployment from a git repo or Docker image repository through those services.
Post-Deployment Health Checks
Once the app is deployed, having a simple health check endpoint is beneficial. We use an HTTPS request to this endpoint before marking the environment as fully deployed. This approach helps us ensure the deployment was successful. The health check endpoint should ensure it can run a simple query against the database and access any other required shared resources the app needs to function. Finally, consider setting up automated smoke tests against the deployed environment to ensure they work entirely. This approach could be as simple as doing a few HTTPS requests to ensure the login functionality works successfully.
Observability
The goal is to build a high-quality web-based application that can be run reliably in production. To provide a foundation for operating the web app, we include tooling for monitoring, tracing, and logging right from the start. This tooling will ensure we can quickly find and fix bugs that might make it to production while ensuring our application or API performs within the defined limits.
Monitoring
Open Telemetry is an industry standard now supported by many vendors for monitoring, tracing, and logging. It has libraries for many different web programming platforms. You can move between vendors quickly if needed. Some of the vendors we have seen that have Open Telemetry support are:
There are also open-source solutions you can install and run on your infrastructure. The OpenTelemetry libraries provide auto-instrumentation for many web frameworks, enabling you to start quickly without adding much code to your application. As you develop your app, you can add custom instrumentation for more detailed insights beyond what auto-instrumentation provides.
These tools offer a good starting point for monitoring errors and tracking application performance. Many also support distributed tracing, allowing you to track operations spanning several microservices. Some vendors, like Sentry, excel at error tracking and performance monitoring but might be weaker in other areas like logging. Evaluate each tool to see which works best for your organization. Our experience has shown that good error tracking and performance monitoring are essential early in an application’s life.
Logging
When starting a new web application or API, we like to start with two types of logging: general logs and audit logs.
General Logs
General logging involves capturing details about a particular debugging request that comes into the app. Each request should get assigned a unique identifier so you can track it throughout its life cycle. Many logging libraries and web frameworks can help you do this. These logs come in handy as you develop and debug your application.
Audit Logs
Medical IoT applications often require detailed logs. We log who made each request (user and IP address), what was requested, and when the request was received. These logs enhance security and support compliance with HIPAA or SOC 2 policies.
Documentation
We typically use a set of technical design, formal requirements, and developer document templates for each application we build. This approach allows us to plan out our application and lay the groundwork for any necessary regulatory submissions. By starting these documents early in the development process, you can ensure they capture all the critical decisions and requirements along the way.
Technical Design Documents
- High-level design document (HDL)
- Low-level design document (LDL)
- Data model document
On the technical design side of our documentation, we often have a high-level design document (HDL), a low-level design document (LDL), and a data model document. The data model document can be separated or included in the HDL or LDL. The high-level design document captures the application’s design from a ten-thousand-foot view. The low-level design document dives into deeper detail about each application component. We typically use an Agile approach to populate these documents during development rather than filling them out entirely upfront. Consequently, a solid initial technical design saves time during development.
Formal Requirements Documents
- Use Cases
- Software Requirements Specification (SRS)
- Software Test Plan (STP)
Our teams typically create use cases for the formal requirements documents based on interviews with subject matter experts from the product management team. These use cases help us develop the Software Requirements Specification (SRS) document. The SRS is a basis for building a Software Test Plan (STP) document. The STP is populated with references to requirements from the SRS.
Developer-Level Documentation
- “Read me” file
- Architecture Decision Records (ADRs)
We recommend having developer-level documentation, including a “read me” file in the root of the code repository. This file should cover how to run, build, and execute the tests locally. It should include links to other documentation, such as those listed above. We also suggest creating a folder and template for Architecture Decision Records (ADRs). Start with one outlining the reasons for choosing the particular tech stack and authentication method. The “read me” document should also include a section on cloud deployment. This section explains how to initiate deployment and details the cloud resources created and managed through the app’s deployment scripts and infrastructure as code files. This approach is also a good place to link to the Swagger Docs discussed above. This allows new developers to see quickly what API endpoints are available.
Final Thoughts
Building a robust medical web API or app is a complex undertaking that requires a deep understanding of the unique challenges and best practices in the healthcare and IoT software development domains. We hope this article’s blueprint helps provide you with a clear path towards building your own effective medical web API or app.
However, we recognize that every project is unique, and not everyone has the resources or expertise to start from scratch or execute effectively. You may encounter blockers that are difficult to resolve on your own, slowing down your progress and hindering your ability to achieve your goals.
That’s where Punch Though’s team of cloud experts can come in. With years of experience in developing cutting-edge, connected medical devices, including their ecosystems and medical web APIs and apps, we’ve helped numerous clients navigate the complexities of this landscape and bring their vision to life. When challenges arise, we’re here to help you do more, overcome obstacles, and reach your objectives.