LightBlue has the ability to send data received from your BLE devices via indication or notification to Adafruit’s IO platform.
You’ll be prompted to provide some information for your Adafruit IO set up from within LightBlue® when you opt to send data to it. This guide aims to help you set up your Adafruit IO account so that you can provide the information required for LightBlue® to send data to your AWS IoT instance.
Before we begin
- Prerequisites
- A BLE device/peripheral that supports notification or indication.
- An Adafruit IO account. It’s free to sign up and use, but Adafruit also offers a premium tier that supports an unlimited amount of feeds. The free account is more than sufficient for the purposes of this tutorial. Punch Through is not responsible for any usage charges incurred as a direct or indirect result of following this guide or using the LightBlue® Cloud Connect feature in general.
Step 1: Obtaining your username & secret AIO key
- If you don’t already have an Adafruit IO account, sign up here.
- Each Adafruit IO account has a username and a secret AIO key associated with it. The app requires both pieces of information in order to authenticate with the Adafruit IO server.
- The username is straightforward and is the username you used to sign up for your Adafruit IO account.
- The secret AIO key can be found by signing into your account at Adafruit IO and going into your account Settings. The first item should be “View AIO Key”, tap on that and there should be a QR code on the screen. You’ll be given the option to scan this QR code in LightBlue Explorer later.
Step 2: Sending BLE indication data to Adafruit IO via LightBlue
- In LightBlue, connect to your BLE device with at least one characteristic that supports notification or indication, and tap on that characteristic after the initial connection.
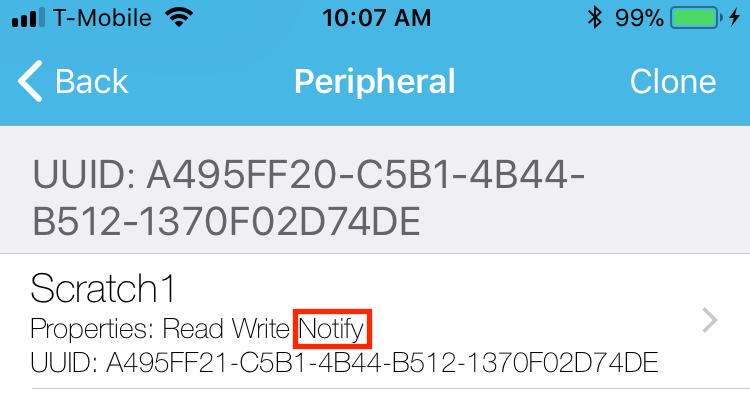
- You’ll see a toggle for the Cloud Connect feature, flip that switch to enable the feature and select “Adafruit IO”.

- Populate the text fields in the alert dialog that appears with your Adafruit IO username and secret AIO key for the first two fields. If you have the QR code for the secret key handy on another device, you can opt to scan the QR code. Note that if you have previously filled in these fields before, they’ll be pre-populated for your convenience, but can be changed easily.
- The third field corresponds to the name of the Adafruit IO feed that will appear on your Adafruit IO dashboard. By default, LightBlue® Explorer suggests a name based on the BLE device name, but feel free to change it to anything you like! If you’re going to be listening to notifications or indications from multiple characteristics of this device, it is highly recommended that you provide a feed name that would distinguish data from this characteristic from the rest.
- You have the option of sending the indicated data as a numerical value or as a hex string. We highly recommend sending data as a number if you’re certain that the data coming from the BLE device are numbers, as that’ll allow you to visualize the value changes over time in the form of a beautiful line graph. If you’re unsure of the form of data that you’ll receive, choose to send the data as a hex string.
- You’re now ready to start sending BLE indications data to your Adafruit IO feed! Tap on “Listen for notifications” above the cloud feature toggle, and the data that appears in the “read/notified values” section should get sent to Adafruit IO.
Step 3: Looking at the feed data on Adafruit IO
- Now that the data received via BLE indication is set up to be sent to Adafruit IO, you can see the data arriving in real time by visiting the Feeds page on your Adafruit IO account. The actual URL should look something like
https://io.adafruit.com/your-username/feeds.
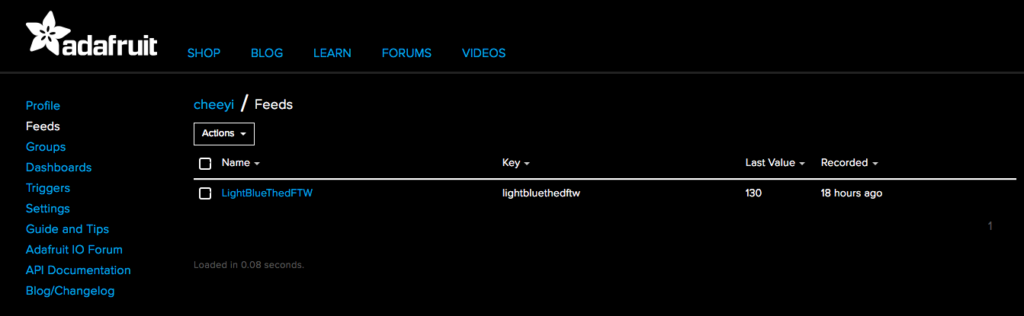
- The feeds page also provides a history of the stream of data with timestamps. If the data is in the form of a numerical stream, the page will also display a convenient graph plot over time of the data value.

Step 4: Visualizing multiple data sources using an Adafruit IO dashboard
- LightBlue® Explorer supports listening to indications and notifications from multiple characteristics of the same BLE device, and you can take advantage of that by enabling the Cloud Connect feature on multiple characteristics! We recommend using different feed names for different characteristics so that you can easily distinguish them as coming from separate data sources.
- Adafruit IO provides a dashboard feature accessible from
https://io.adafruit.com/your-username/dashboardsthat is perfect for visualizing data from multiple feeds.
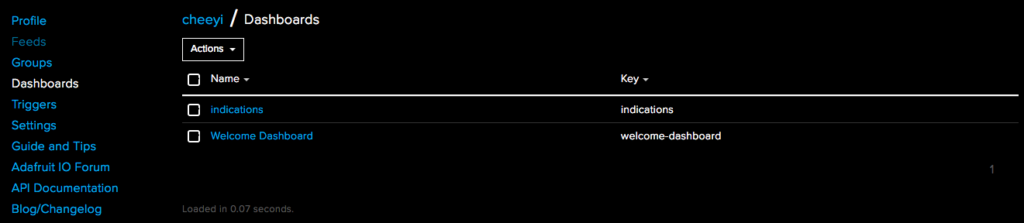
- You can create a new dashboard and add “blocks” to it. You can freely resize each block and move them around the dashboard interface.

- Each block is a way to visualize any existing data from your feeds, and we encourage you to experiment with them to find the one that suits your needs. For instance, a line graph is perfect for visualizing numerical values while a stream provides a console-like log output of data arriving in real time, complete with timestamps on each entry.

- Here’s an example of a line graph that is set up to display data from two different feeds.

- We hope this guide has been helpful in getting you started with Cloud Connect, happy hacking!
Want to Know More?
Want to know more about the makers of LightBlue®? Learn about who we are and what we do.