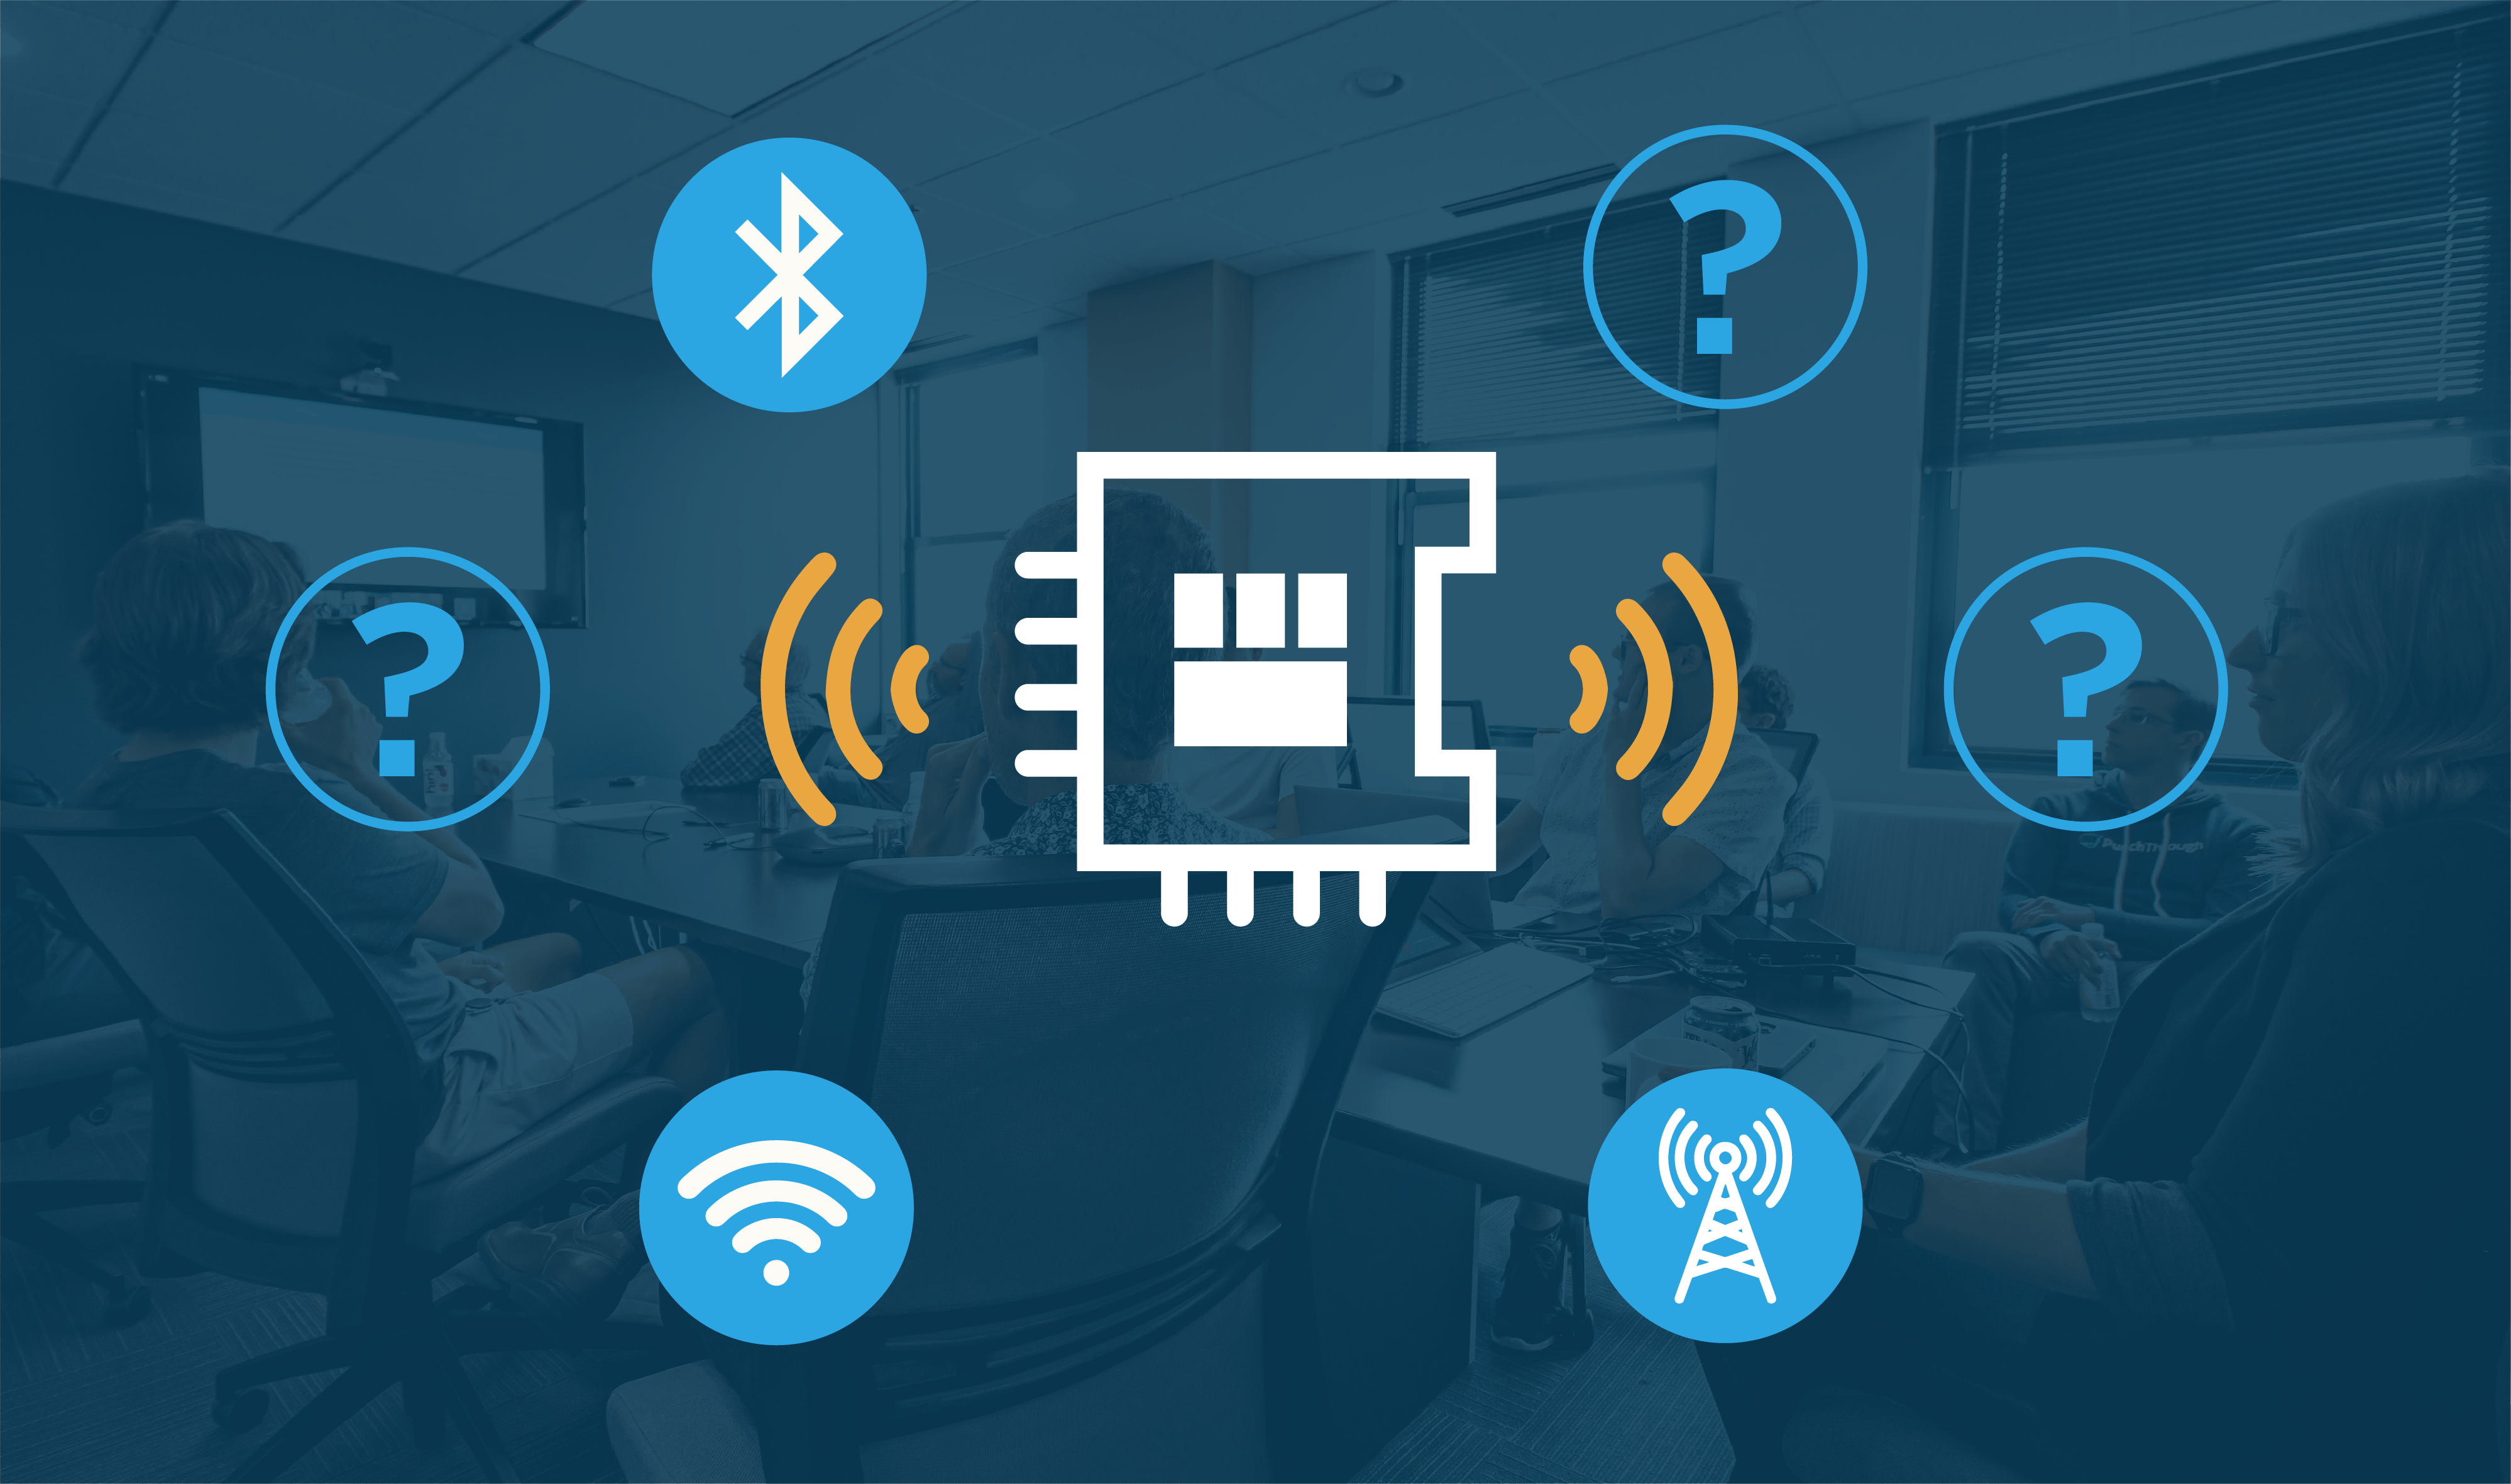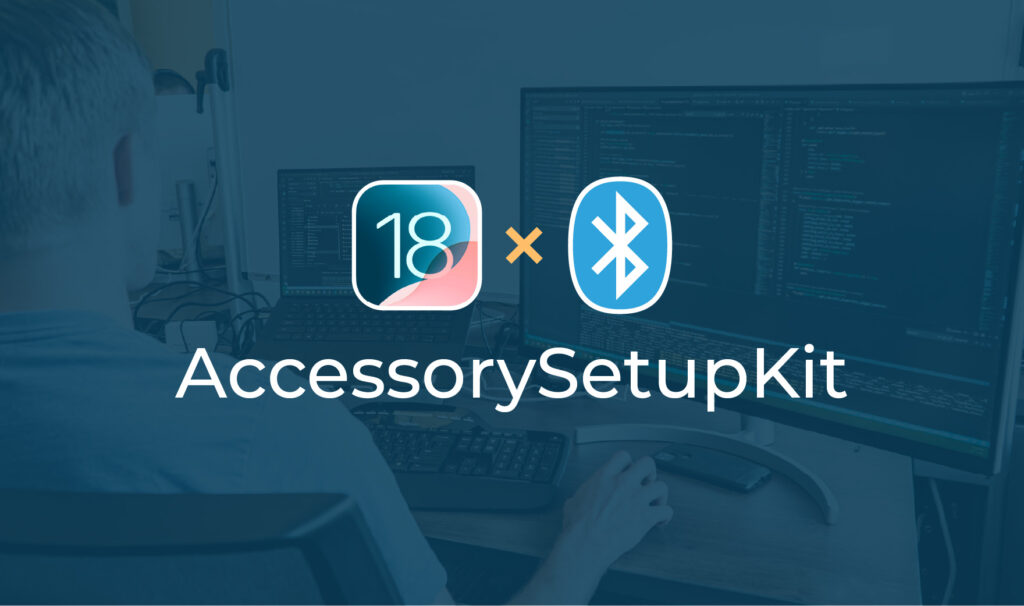
Apple’s WWDC 2024 brought exciting advancements for Bluetooth Low Energy (BLE) developers with the introduction of AccessorySetupKit in iOS 18. This new framework is designed to streamline the discovery and configuration of companion devices, offering a more efficient and intuitive process. By eliminating complex permission prompts and simplifying device pairing, AccessorySetupKit enhances the user experience for both developers and end-users.
While AccessorySetupKit introduces new options, it complements existing methods of discovering companion devices rather than replacing them — offering developers greater flexibility.
What This Article Covers
In this article, we’ll explore the key features of AccessorySetupKit. You’ll learn how it differs from current frameworks, its effect on BLE bonding and connection sharing, and how developers can leverage it to create smoother, permission-free interactions with BLE devices. While we’ve begun to dive into this framework, some aspects remain speculative as we continue to explore its full capabilities.
While AccessorySetupKit also supports Wi-Fi and Local Network device discovery, this post will focus specifically on BLE. The setup process for Wi-Fi and Local Network devices should follow a similar approach.
What is AccessorySetupKit?
AccessorySetupKit is a new framework in Apple’s iOS 18 that simplifies the process of discovering and configuring Bluetooth Low Energy (BLE), Wi-Fi, and Local Network devices. It offers a unified user experience by managing device discovery at the operating system level, eliminating the need for disruptive permission prompts and custom device selection UI.
Instead of requiring apps to handle device discovery logic, AccessorySetupKit performs the scanning and filtering of devices for you. The OS presents users with only the devices that meet the criteria defined by the app, streamlining the process. Once the user selects a device and grants permission, the app is then able to interact with that device, eliminating the need for manual permission handling and reducing state combinations.
By handling this critical part of the device connection workflow, AccessorySetupKit helps ensure a more seamless and user-friendly interaction for companion devices, especially those relying on BLE.
Setting up an AccessorySetupKit Session
At a basic level, setting up an AccessorySetupKit session involves the following:
- Declare supported device filter criteria in the Info.plist
- Activate a discovery session
- If looking for a new device, display the picker view
- Retrieve peripheral object for accessory (new or existing)
- Interact with the selected peripheral as a normal Bluetooth device using the CoreBluetooth framework.
Attempting to configure device filters at runtime that do not match the filters declared in the app’s Info.plist, or attempting to retrieve peripheral objects for UUIDs other than ones configured through AccessorySetupKit will result in the app being terminated.
New BLE Bonding Capabilities
AccessorySetupKit introduces a powerful new BLE functionality — namely, the ability for apps to control the lifecycle of BLE bonds programmatically. As this is a new framework, some bonding behaviors may evolve over time as we continue to learn more about its full potential.
Establishing a BLE Bond
When connecting to a device discovered via AccessorySetupKit, pairing and bonding (or pairing without bonding) occurs without the usual OS pairing prompt. Once bonded, an entry for the device appears in the iOS’ Settings app’s Bluetooth devices list, just like other bonded devices. Devices that do not support pairing will still show up in the device list when discovered through AccessorySetupKit.
If a device is unbonded and rotates its BLE address, it may become unconnectable. Without bonding, the BLE central cannot identify a device with a new address. BLE bonding, however, ensures that the device’s identity remains resolvable to bonded peers even when addresses are rotated for privacy.
Removing the BLE Bond
AccessorySetupKit also provides a method for removing a device that has been discovered. This action deletes the BLE bond and removes the device from the iOS Settings app’s BLE device list. At this time, this method is the only way to delete a BLE bond programmatically from a third-party app.
In our view, this is a huge UX boon for apps managing multiple BLE bonds throughout their installation lifecycle because these apps now no longer require users to navigate to Settings > Bluetooth to forget bonded peripherals manually.
Security Drawbacks of BLE Bonding
BLE bonding offers many advantages for simplifying device management, but it introduces potential security risks that developers need to be mindful of. One notable drawback is that the bond is created at the OS level, not the app level. This means any app on the device can communicate with the bonded BLE device. AccessorySetupKit does not provide additional safeguards to alter this behavior, so developers should rely on app-level security measures.
For more on securing BLE systems, check out or articles on BLE Security.
Connection Sharing
While AccessorySetupKit introduces new BLE discovery features, it does not prevent other apps from interacting with the same device. Even when a device is discovered via AccessorySetupKit, other apps can connect to it using CoreBluetooth or a separate AccessorySetupKit session. This interaction between apps and connected devices raises important considerations, particularly around how pairing, bonding, and sharing accessories are managed.
CoreBluetooth Pairing
CoreBluetooth may still prompt the user for pairing, even if the device is already bonded via AccessorySetupKit. If the device is removed via AccessorySetupKit, we expect that the bond will also be removed for both AccessorySetupKit and CoreBluetooth. Regardless of how many apps have discovered the device — either via AccessorySetupKit or CoreBluetooth — only one device entry will appear in the Bluetooth list within the OS’ Settings app.
Handling Multiple Bonds
We don’t expect a separate BLE bond to be created when an AccessorySetupKit-connected peripheral is scanned and connected using CoreBluetooth. However, if the pairing prompt does initiate a separate pairing and bonding process, embedded devices could limit connection sharing by restricting the number of active bonds allowed. For instance, the firmware could be designed to allow only one bond at a time, thereby rejecting additional connection attempts from other apps or devices.
While this could limit unauthorized connections, it would also introduce complications, such as reduced flexibility when switching between apps or devices. In any case, the most reliable approach to securing sensitive communications remains application-level authentication and encryption.
As we learn more about AccessorySetupKit’s full capabilities and behaviors, we will update this section to provide further clarity.
Accessory Sharing
When an app discovers a device via AccessorySetupKit that has already been set up by another app, the device picker prompt changes slightly, asking the user if they’d like to share the accessory with the new app rather than set it up. We believe that a device will only appear to a second app if it is nearby and actively advertising. However, it’s possible that an accessory will appear if it’s actively connected to another app, regardless of whether the device is actively advertising.
For example, in Apple’s sample project, two iOS devices continued advertising while connected, which allowed another app to discover the accessory. It remains to be seen whether this behavior will be consistent across other setups, but being already connected to one app did not prevent discovery by another AccessorySetupKit app.
User Experience
AccessorySetupKit streamlines the process of discovering and connecting devices, reducing the complexity of permission prompts and custom UIs. By managing this at the system level, users are presented with only relevant devices, making the experience more intuitive. Here, we’ll explore how this new approach works and its key features for developers.
The Setup Prompt
For each type of device you’d like to discover with AccessorySetupKit, you need to define an ASPickerDisplayItem and pass it to the picker. This object contains a user facing name for the device, an image to represent the device, and the filter criteria used to discover the device.
When showing the picker, initially a spinner will be displayed until a device is discovered. Then the window transforms into the prompt shown below. When multiple devices are discovered, a page indicator appears below the image, and the user can swipe left and right to select a device.
The system prompts displayed by AccessorySetupKit include 4 pieces of configurable information:
- “App Supplied Name”: the string passed into the
ASPickerDisplayItem - Image (car on ferry): an image passed into the
ASPickerDisplayItem - “Advertised Name”: the device name captured from the BLE advertisement
- “App Name”: the display name of the iOS application which is adding the accessory (info.plist bundle name)
While the Setup Prompt is displayed, it appears that the user cannot leave the app via normal interaction. This may change with the public release of iOS 18.
iOS Settings App Changes
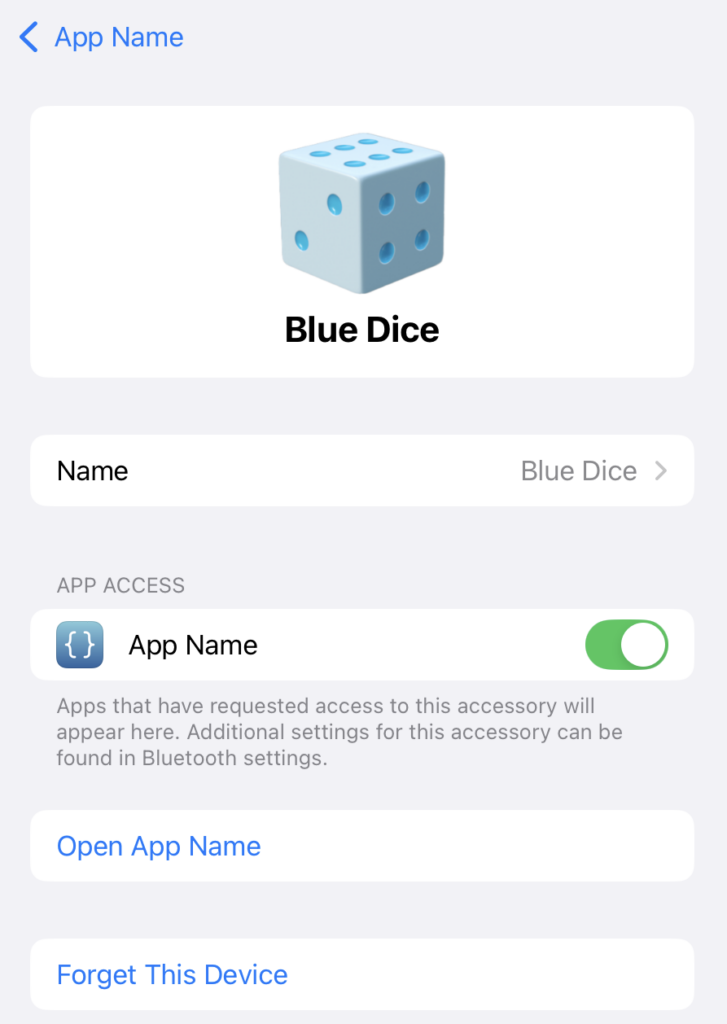
Accessories now appear in several locations in the iOS Settings app, along with several new options compared to regular BLE devices. On the Bluetooth page’s device list, the device entry’s detail view includes the image used for the AccessorySetupKit prompt and the ability to open the associated app (“App Name” in the screenshot below).
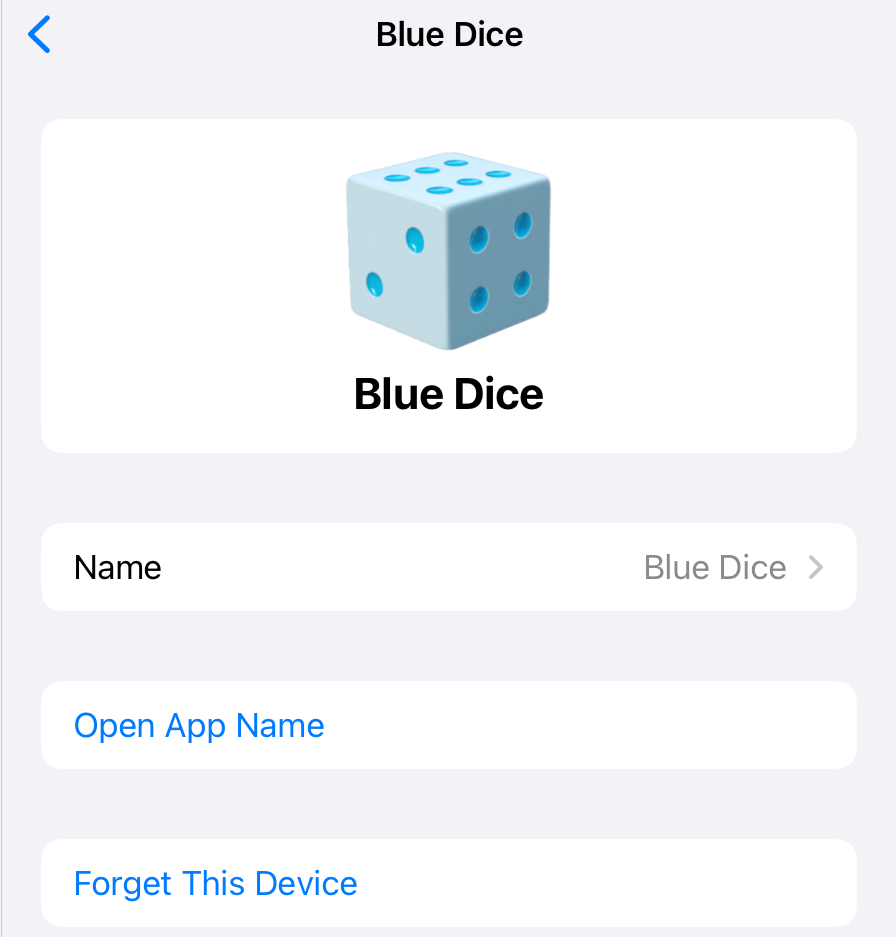
In the app-specific settings for “App Name” a new section, “Accessories” exists. Tapping into this option displays a screen similar to the one on the Bluetooth device list, but it includes the ability to revoke each authorized app’s access to that accessory.
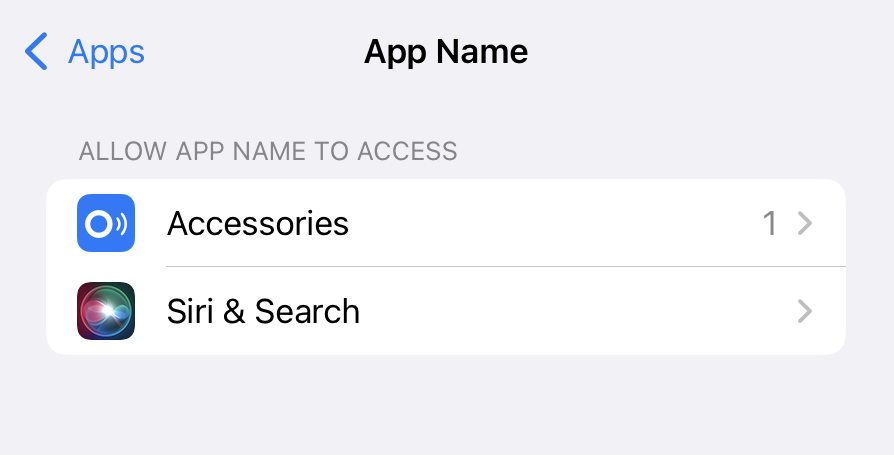
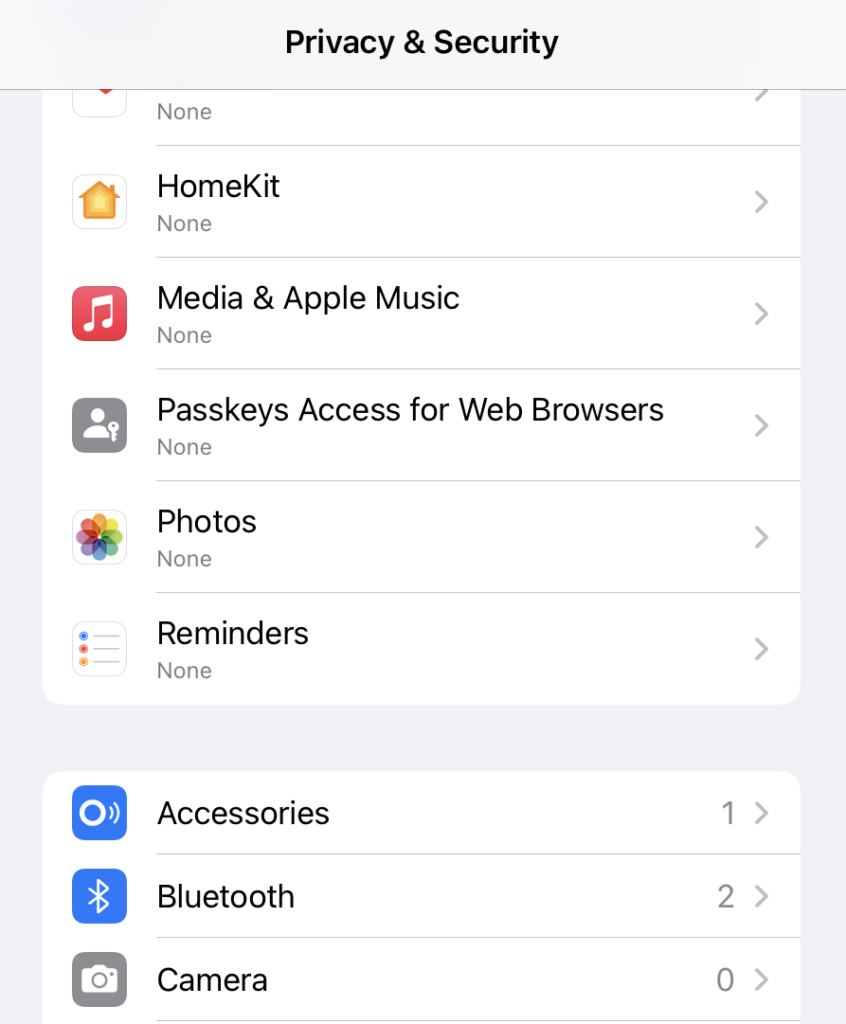
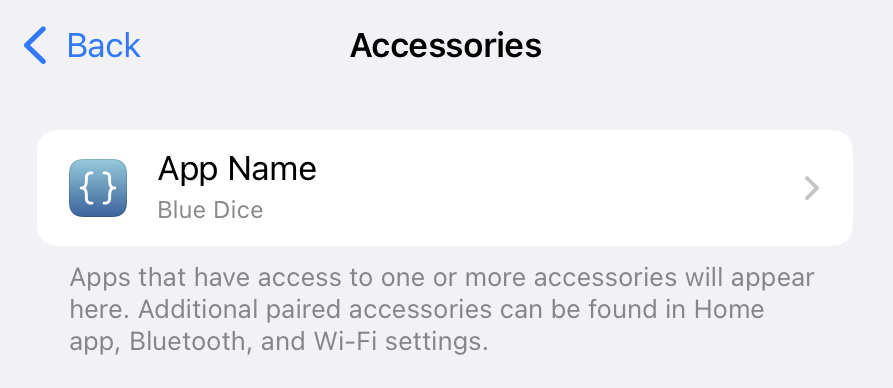
Under “Privacy and Security” a new listing exists for “Accessories.” This section contains a list of all apps that have access to accessories, and selecting an entry displays the same page as accessing the accessory through the app-specific settings entry.
Apple’s Development Guide
The above covers the behaviors regarding discovering and connecting to BLE peripherals that we are aware of. Suppose these behaviors sound like a more appealing user experience for your product than the current user experience obtained with CoreBluetooth alone. In that case, the rest of the post will provide guidance on implementing device discovery.
Apple’s documentation for AccessorySetupKit can be found here: https://developer.apple.com/documentation/accessorysetupkit
Implementing Device Discovery & Filtering
Now that we’ve covered how AccessorySetupKit simplifies bonding and connection management, let’s dive into the specifics of how developers can implement device discovery and filtering. AccessorySetupKit provides powerful tools for discovering BLE peripherals and applying precise filtering criteria, enabling you to tailor the discovery process to your app’s needs.
CoreBluetooth Differences
To use CoreBluetooth with AccessorySetupKit and bypass the privacy permission prompts, do not declare Bluetooth usage in your app’s Info.plist. Instead, by declaring the necessary AccessorySetupKit keys, your app gains access to a subset of CoreBluetooth functionality without going through the standard permission flow.
Rather than using CBCentralManager to scan for devices, pass the peripheral UUID provided by AccessorySetupKit into CBCentralManager’s retrievePeripherals function. The corresponding CBPeripheral object will be returned. Attempting to retrieve peripherals that your app doesn’t have access to via AccessorySetupKit will cause the app to terminate.
Once you have the CBPeripheral object, it can be interacted with like any other BLE device — there are no further limits on how you use CoreBluetooth with that peripheral.
One notable difference when using CoreBluetooth with AccessorySetupKit is that CBManagerState only takes on the states .poweredOn and .poweredOff. In testing, the states .unknown, .unauthorized, and .unsupported were not seen. While .unsupported may still appear in rare cases, it makes sense that .unauthorized is not shown. The absence of .unknown was unexpected, as it’s typically the initial state when initializing CBCentralManager.
Implementing AccessorySetupKit
To perform device discovery using AccessorySetupKit, perform the following:
- Create
ASPickerDisplayItem‘s for each type of device you’d like to discover. Specify a name, image, and filter criteria. When using multiple filter criteria, devices must match all criteria to be discovered. To match devices to only some criteria, create multipleASPickerDisplayItems. Ensure specified filter criteria is also added to the app’s info.plist. - Instantiate an
ASDiscoverySession. - Activate the
ASDiscoverySessionvia theactivate(on:eventHandler:)function. Pass a reference to an event handler callback into activate’s parameters. - Access the
ASDiscoverySession‘saccessoriesproperty once the session is activated in order to retrieve accessories that were previously set up. Otherwise, pass an array ofASPickerDisplayItemstoASDiscoverySession‘sshowPicker(for:)method. - Once a new or existing
ASAccessoryhas been retrieved or selected by the user, use thebluetoothIdentifierproperty to retrieve theCBPeripheralobject from CoreBluetooth viaCBCentralManager‘sretrievePeripheralsfunction and treat it as a normal peripheral object. - Perform any further device retrieval/discovery by repeating steps 4 and 5, and then clean up the
ASAccessorySessionvia theinvalidatemethod.
ASDiscoverySession‘s removeAccessory method can be used to remove the device from the accessory list and delete any BLE bonds. The methods renameAccessory, finishAuthorization, and failAuthorization appear to be related to Wi-Fi accessories, and have no role for BLE accessories.
For apps that have previously connected to accessories using solely CoreBluetooth, it looks like those accessories can be migrated to AccessorySetupKit by creating ASMigrationDisplayItems with the accessory’s peripheralUUID and passing them into the showPicker(for:) method.
AccessorySetupKit Discovery Descriptors
In order to discover accessories, ASPickerDisplayItems need to be created specifying filter criteria, called discover descriptors (not to be confused with BLE’s concept of descriptors). For BLE, discover descriptors refer to advertising data. The following advertising data fields can be used for filtering
- Bluetooth Name Substring
Substring of the advertised local name field. Will match any substring within the advertised name. Requires a discovery descriptor for company Identifier or service UUID to also be specified - Bluetooth Service UUID
Matches either an advertised service UUID field or the key (service UUID) of an advertised service data field. When matching service data, an optional data blob and mask can be specified to filter based on the service data’s contents. - Company Identifier
Matches the key of an advertised manufacturing data field. An optional data blob and mask can be specified to filter further based on the manufacturing data’s contents.
Name substrings, service UUIDs, and company identifiers must be specified in the info.plist Otherwise the app will be terminated in response to the showPicker(for:) method.
<dict>
	<key>NSAccessorySetupBluetoothCompanyIdentifiers</key>
	<array>
		<string>FFFF</string>
	</array>
	<key>NSAccessorySetupBluetoothServices</key>
	<array>
		<string>ABCDEF12-3456-7890-ABCD-EF1234567890</string>
		<string>180F</string>
		<string>180E</string>
	</array>
	<key>NSAccessorySetupBluetoothNames</key>
	<array>
		<string>iPhone</string>
	</array>
	<key>NSAccessorySetupKitSupports</key>
	<array>
		<string>Bluetooth</string>
	</array>
</dict>
Data Blobs and Masks
To filter based on service data or manufacturing data contents, provide data blob and data mask properties to the ASPickerDisplayItem. These values do not need to appear in the info.plist. Blob and mask objects are of type Data. They need to have an equal length, and be the exact length of the advertised values.
AccessorySetupKit will attempt to match the Blob object excluding the bitmask represented by the mask object. Bits that are masked out are expected to be zeroed out in the blob object. For example:
- Blob: 01, 02, 03, 04, 05, 06
Mask: FF, FF, FF, FF, FF, FF
Checks for an exact match - Blob: 01, 02, 03, 04, 05, 00
Mask: FF, FF, FF, FF, FF, 00
Checks for an exact match of the first 5 bytes and ignores the 6th - Blob: 01, 02, 03, 04, 05, 06
Mask: FF, FF, FF, FF, FF, 00
Does not appear to match anything
In Summary
Apple’s iOS 18 AccessorySetupKit framework introduces powerful improvements to how BLE devices are discovered, paired, and bonded. The ability to manage BLE bonds programmatically and streamline device discovery without system prompts is a game-changer for BLE-based applications. As AccessorySetupKit evolves, we’ll continue to provide new insights and updates to ensure that developers are well-informed about its full capabilities.
We hope this article has deepened your understanding of how AccessorySetupKit can enhance your application and clarified some of the framework’s finer details that may not be fully covered in the official documentation. If you need expert guidance on solving BLE connectivity challenges or building next-generation IoT solutions, the Punch Through team is here to help. Let’s work together to bring your vision to life.