Imagine you are a mobile software developer that’s been tasked with implementing support for a new BLE device. But there’s one catch: The device doesn’t exist yet.
Not a problem! You can use bleno, a Node.js module, to mock out a BLE peripheral and get started on the mobile software implementation right away.
Sound like something you could use? Follow along, and you’ll have a simulated BLE peripheral running in minutes.
Why Use bleno Instead of Another Module?
While this post will focus on bleno, there are multiple ways you can mock a BLE peripheral. Here are a few:
LightBlue® is super useful when you need to test something quickly. It’s very easy to clone a real peripheral you’ve scanned and create a virtual copy of it, to create a virtual peripheral from a standard GATT specification, or to create a custom virtual peripheral. But LightBlue doesn’t offer the ability to script functionality into your virtual ATT server to configure the behavior of your peripheral. That’s where the following options excel.
BlueZ is a Bluetooth stack for Linux. There are multiple python libraries or projects you can use to interface with BlueZ and mock a BLE peripheral, such as python-gatt-server from Jumper Labs or python-bluezero. The python + BlueZ approach offers the flexibility of writing code so that your peripheral can perform some more complex logic and data manipulation. BlueZ is widely supported across Linux distributions, but it isn’t available on other operating systems.
Bleno is a Node.js module, and Node.js can run on macOS, Windows, or Linux. If you’re working with a team where multiple developers could benefit from being able to run the virtual peripheral for development or testing, bleno is an excellent option. You can easily add the javascript code to a version control system, such as git, so that your whole team can easily run their own instance of the virtual peripheral.
Depending on your background, working with Javascript may be an easier point of entry than the Linux/python/BlueZ route. And like the python/BlueZ approach, bleno allows you to script additional logic into the behavior of your virtual peripheral, such as computing data to send on read and notify events or reacting to write events. Due to wide platform support, ease of installation, and low barrier of entry with javascript, bleno makes a strong case as the best option when mocking BLE peripherals.
Why is it Useful to Mock a Peripheral?
There are multiple reasons why you may want to mock a BLE peripheral. As a mobile developer, you may be involved in a project where other members of your team, or another vendor, are actively working on the development of hardware/firmware while you need to get moving on mobile software. If your BLE device’s services and characteristics are already defined, you can quickly mock up a virtual peripheral and get moving on integrating your mobile software without being held up by hardware or firmware development.
Alternatively, you may be involved in a project where you’re designing the ATT server architecture. With bleno, you can rapidly prototype and make adjustments as you lock down the architecture definition. A mock peripheral can also be used for testing mobile software. By adding some code to your mock device, you can manually cause some edge cases, such as forcing a disconnection, to test how your mobile software handles the situation. Knowing how to set up a simulated BLE peripheral is a valuable tool for a mobile developer working with BLE devices.
Getting Set Up
To get started mocking BLE peripherals with bleno, you’ll first need to install Node.js. Click here to download the installer for your platform.
Once you have Node.js installed, create a new folder and name it bleno. This folder will be used to store your virtual peripheral code as well as the bleno installation. From the command line, navigate into your new bleno folder.
Next, install the bleno module with the command npm install bleno or npm install github:notjosh/bleno-mac*
*NOTE: If you want to run bleno on macOS, you should install bleno-mac. While you can use bleno on mac, this fork is a safer option for mac as it uses the official CoreBluetooth APi.
At the moment, there appears to be an issue causing an incompatibility on macOS 10.15.2. Keep an eye on the GitHub page if you are impacted by this issue.
5/1/20 Update:
I was able to get bleno working on macOS Catalina (10.15.4) by utilizing the following node packages:
bleno
github:notjosh/bleno#inject-bindings
bleno-mac
github:notjosh/bleno-mac
xpc-connection
github:sandeepmistry/node-xpc-connection#pull/26/head
I had to delete my project’s “node_modules” folder, then delete “~/.node-gyp”, then install each of the 3 above packages (ie. “npm i github:notjosh/bleno-mac”).
After installing those three packages, I am able to run bleno on macOS Catalina.
Once you’ve finished those installations, we can get started with configuring your custom BLE peripheral.
If you’re already comfortable with javascript, there are more complex examples of mock peripherals.
Configuring the Simulated Peripheral Service
Let’s get started on the javascript code to create a service for your simulated peripheral. Create a new file named service.js inside your bleno folder.
Add the following code to service.js:
//NOTE: use 'bleno-mac' here if you installed that module
var bleno = require('bleno') ;
var BlenoPrimaryService = bleno.PrimaryService;
This imports the bleno module and makes the bleno PrimaryService available for use.
Now, let’s add a state change handler:
bleno.on('stateChange', function(state) {
console.log('on -> stateChange: ' + state);
    if (state === 'poweredOn') {
        console.log("request startAdvertising");
        bleno.startAdvertising('CustomService', ['27cf08c1-076a-41af-becd-02ed6f6109b9']);
    } else {
        console.log("request stopAdvertising");
        bleno.stopAdvertising();
    }
});
This sets up a handler that will fire when there’s a state change to the system’s bluetooth state. You can alter the CustomService service name and the UUID that follows it if you’d like.
Let’s try that out now to make sure everything is working.
From a terminal window that is navigated to the folder where your service.js file is, run the following command:
node service.js
This will start the service, and if your Bluetooth is already on, you’ll see a log statement indicating your service has started advertising. You can toggle your system’s Bluetooth on or off to see your new BLE service start or stop advertising.
Your custom BLE service is set up!
Next, we’ll move on to defining a custom characteristic for our new service. But for now, you can stop the service by entering ctrl-c in your terminal.
Configuring a Simulated Peripheral Characteristic
To add a characteristic to your service, create another file in your bleno folder and name it characteristic.js.
Then add these lines to characteristic.js:
var util = require('util');
var bleno = require('bleno'); //or 'bleno-mac' if you are using that
var BlenoCharacteristic = bleno.Characteristic;
This makes the ‘util’ and ‘bleno’ node modules available, and gives us a reference to the bleno Characteristic model.
Next, let’s begin our characteristic by adding these lines:
var CustomCharacteristic = function() {
    CustomCharacteristic.super_.call(this, {
        uuid: 'fd758b93-0bfa-4c52-8af0-85845a74a606',
        properties: ['read', 'write', 'notify'],
    });
    this._value = new Buffer(0);
    this._updateValueCallback = null;
};
util.inherits(CustomCharacteristic, BlenoCharacteristic);
module.exports = CustomCharacteristic;
Here we’re defining our characteristic. In this example, I named it “CustomCharacteristic,” but you could use whatever you prefer. We’re giving it a UUID, and a list of properties which includes “read,” “write,” and “notify.” We’ll expand more on those properties in a moment.
It then sets the current value to an empty Buffer, and sets the updateValueCallback to null. Then, we specify that our CustomCharacteristic shall inherit from the BlenoCharacteristic object. The final line makes our CustomCharacteristic available as a module.
Now that our characteristic has been defined, the next step is to add some handlers for the read, write, and notify properties.
Configuring Characteristic Event Handlers
Read
For this tutorial, we’re going to configure our characteristic to return the value 42 when read.
To configure the “read” handler, add the following to characteristic.js:
CustomCharacteristic.prototype.onReadRequest = function (offset, callback) {
    console.log('CustomCharacteristic onReadRequest');
    var data = new Buffer(1);
    data.writeUInt8(42, 0);
    callback(this.RESULT_SUCCESS, data);
};
This code will run when a read is performed on this characteristic. It’ll write to the console log, create a buffer with a length of one byte, write a single byte with a value of ‘42’ to that buffer, and finally call the callback function that was passed into the handler with two parameters. The first is a success indicator, and the second is the data buffer with our value of ‘42’.
Write
Next we’lll configure the “write” handler to log written values to the console.
Add the following to characteristic.js:
CustomCharacteristic.prototype.onWriteRequest = function(data, offset, withoutResponse, callback) {
    this._value = data;
    console.log('CustomCharacteristic - onWriteRequest: value = ' +       this._value.toString('hex'));
    callback(this.RESULT_SUCCESS);
};
This code will run when a write is performed to this characteristic. It’ll take in the value that was written, print the value to the log as a hex value String, and call the callback indicating it was a success.
Notify
We’re going to configure the “notify” property to send the current time once every 5 seconds. To support notifications, we need two handlers. One for the subscription, and one for unsubscription.
First, we’ll need a couple variables and a function that we’ll use with the notify handlers.
Add the following to characteristic.js:
var isSubscribed = false
var notifyInterval = 5 //seconds

function delayedNotification(callback) {
    setTimeout(function() {
        if (isSubscribed) {
            var data = Buffer(3);
            var now = new Date();
            data.writeUInt8(now.getHours(), 0);
            data.writeUInt8(now.getMinutes(), 1);
            data.writeUInt8(now.getSeconds(), 2);
            callback(data);
            delayedNotification(callback);
        }
    }, notifyInterval * 1000);
}
The first line here adds a variable where we can track whether the notify subscription is active. The next variable is the interval at which we want to fire notifications in seconds. You can alter this value depending on how frequently you’d like notifications to fire.
Then, we define a function called delayedNotification. The function has one parameter named callback. Inside the function, we use setTimeout to delay the execution of some code by our notifyInterval, which is multiplied by 1000 since the setTimeout function expects milliseconds.
Inside setTimeout, first we check whether isSubscribed is true. If it is, then we create a new Buffer with length of 3 bytes, we create a new Date, and then write the hours, minutes, and seconds to our Buffer. We then call the callback that was passed in to our function, and pass our data buffer through that call. Finally, we call our delayedNotification function again, and pass in the same callback. This will allow our notification to continually fire every 5 seconds until we unsubscribe and set isSubscribed to false.
Now, we’ll add the first of two handlers to be used for the notify process, starting with onSubscribe.
Add the following to characteristic.js:
CustomCharacteristic.prototype.onSubscribe = function(maxValueSize, updateValueCallback) {
    console.log('CustomCharacteristic - onSubscribe');
    isSubscribed = true;
    delayedNotification(updateValueCallback);
    this._updateValueCallback = updateValueCallback;
};
In our onSubscribe handler, we start with a log statement indicating the subscription has been made. We then set the isSubscribed variable to true, and then call our delayedNotification function, passing in the updateValueCallback that we’ll call later to fire the notification.
One more small piece to go for our custom characteristic!
Now, we’ll add the unsubscribe handler by adding the following to characteristic.js.
CustomCharacteristic.prototype.onUnsubscribe = function() {
    console.log('CustomCharacteristic - onUnsubscribe');
    isSubscribed = false;
    this._updateValueCallback = null;
};
This will just set our isSubscribed property to false when the onUnsubscribe handler fires. This will prevent our subscribe handler from calling the callback after the unsubscription has happened.
With that, we’ve finished adding read, write, and notify properties to our custom characteristic!
Adding the Characteristic to the Service
There is one more step before our characteristic can be tested. We’ll have to add our new custom characteristic to the service.
Add the following to service.js:
var CustomCharacteristic = require('./characteristic');
bleno.on('advertisingStart', function(error) {
    console.log('on -> advertisingStart: ' + (error ? 'error ' + error : 'success'));
     if (!error) {
        bleno.setServices([
            new BlenoPrimaryService({
                uuid: '27cf08c1-076a-41af-becd-02ed6f6109b9',
                characteristics: [
                    new CustomCharacteristic()
                ]
            })
        ]);
    }
});
The first line here makes our CustomCharacteristic module available for use in this file. Next, we tell bleno that when the advertising starts, assuming there are no errors, to set the services to an array that contains a BlenoPrimaryService with a UUID that matches the UUID that we are advertising after the poweredOn state change. In the constructor of this service, we create an instance of our CustomCharacteristic.
With that, our coding is complete! We have a BLE service running our custom characteristic with read, write, and notify properties. And we did it with less than 100 lines of code!
This is a simple example, where we’re just sending through some basic number values. You could add all sorts of other logic or expand on the data buffer to pass through more data than just a number, or parse additional data that is written to the characteristic.
If you’re interested in seeing some more complex examples of services you can write with bleno, check out the examples directory on the bleno github page.
Testing the Simulated Peripheral Service with LightBlue Explorer
This step is optional. But if you would like a quick way to test that your new service is available, you can verify it by using LightBlue (available on Android and iOS).
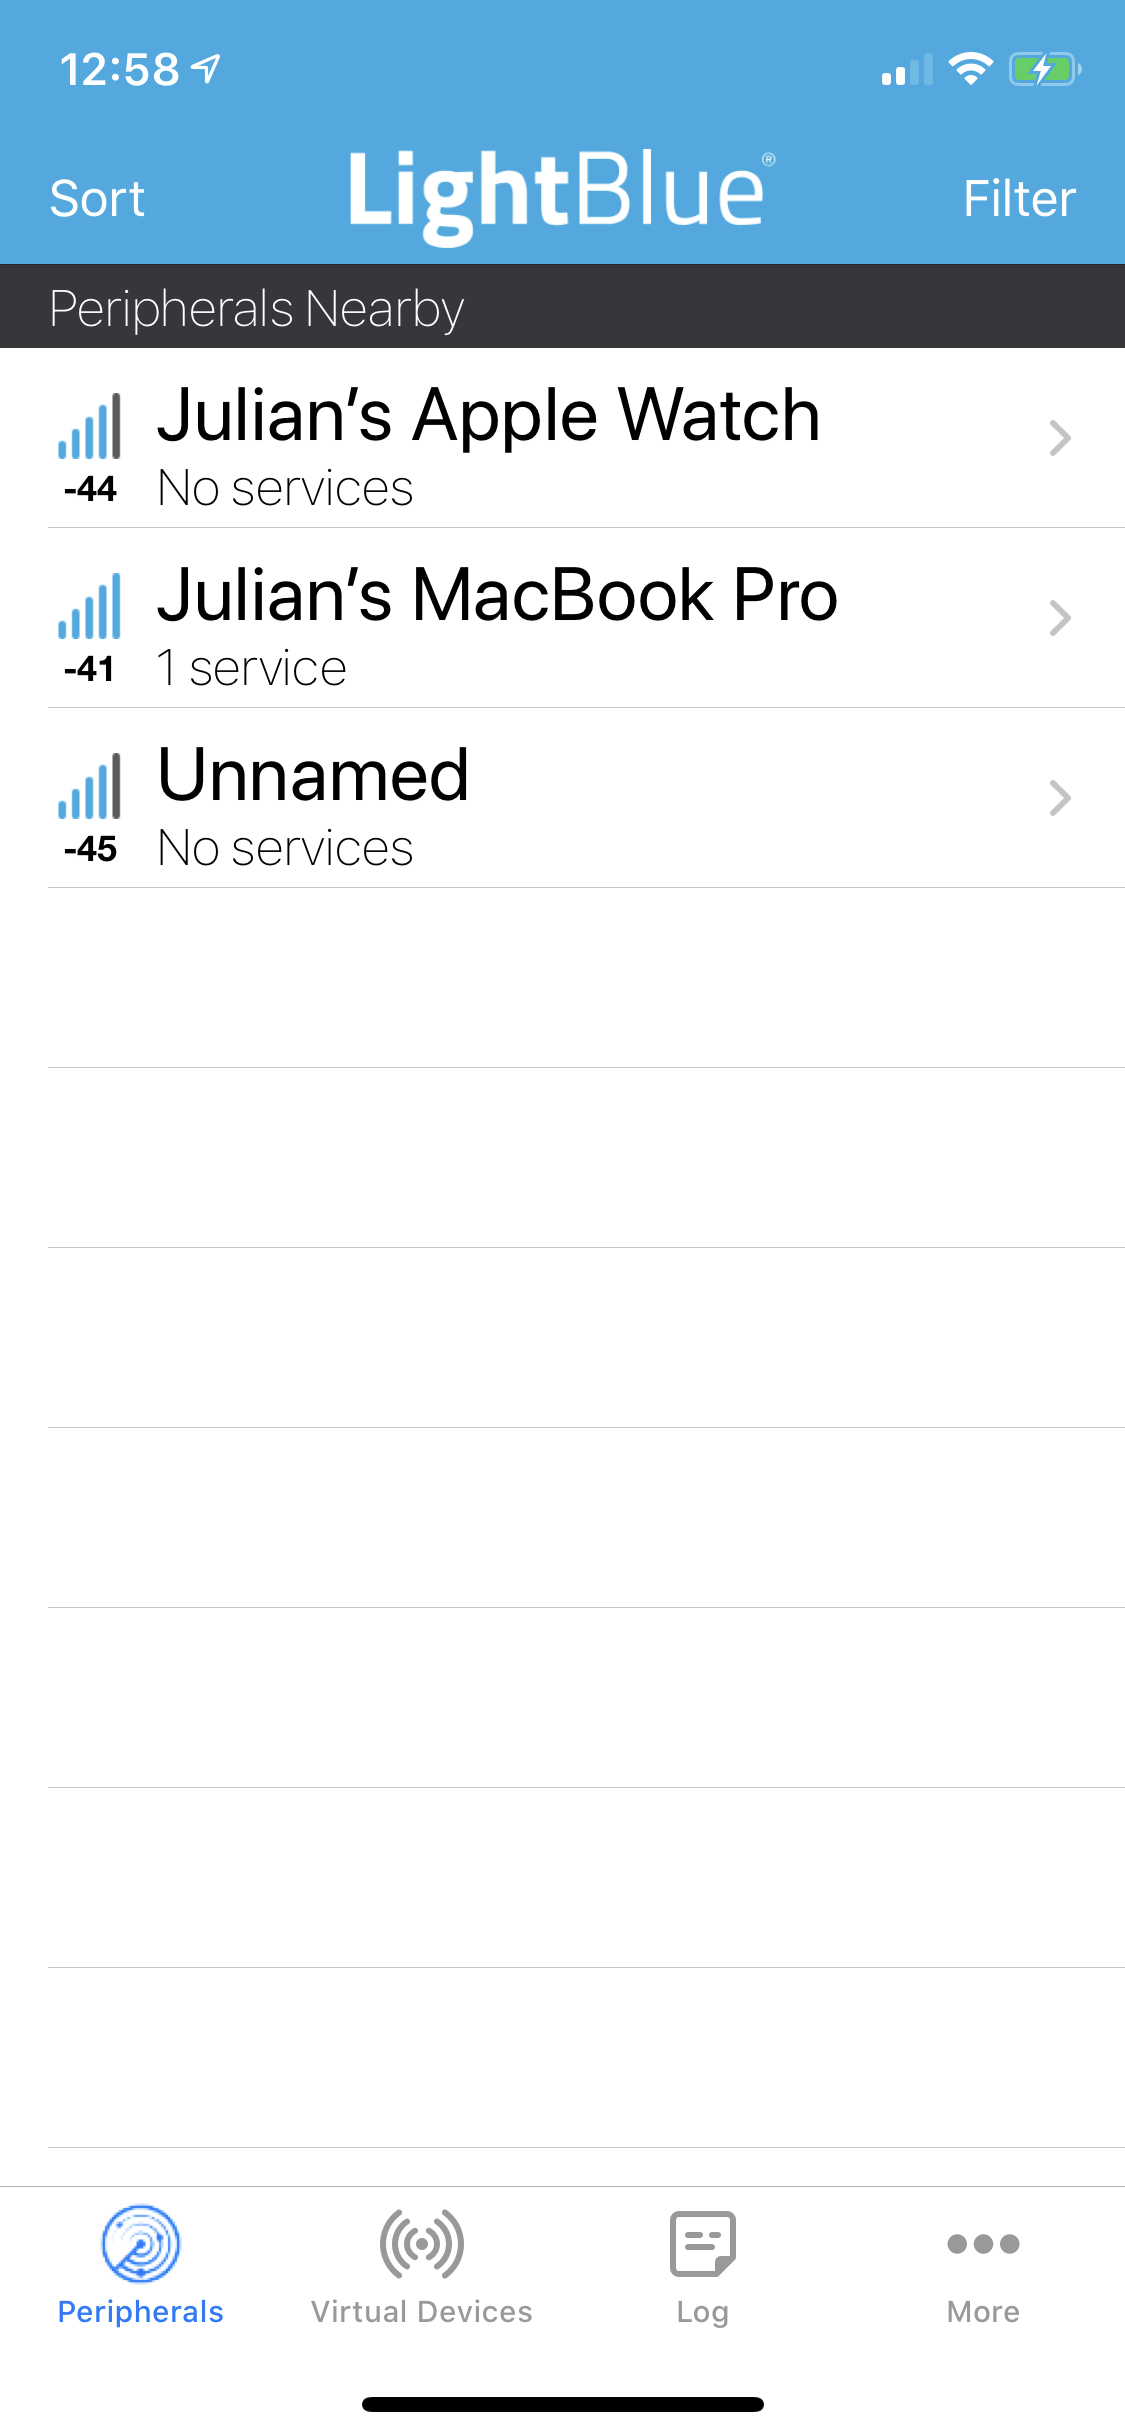
While your node service is running and your BLE service is advertising, run LightBlue from your mobile device. Once the app opens, it’ll load a list of any nearby peripherals it can find. The name of our simulated device will likely match the name of the computer you are running bleno from. In my case, it’s “Julian’s MacBook Pro.”
Locate your device in the peripherals list, and tap on it.
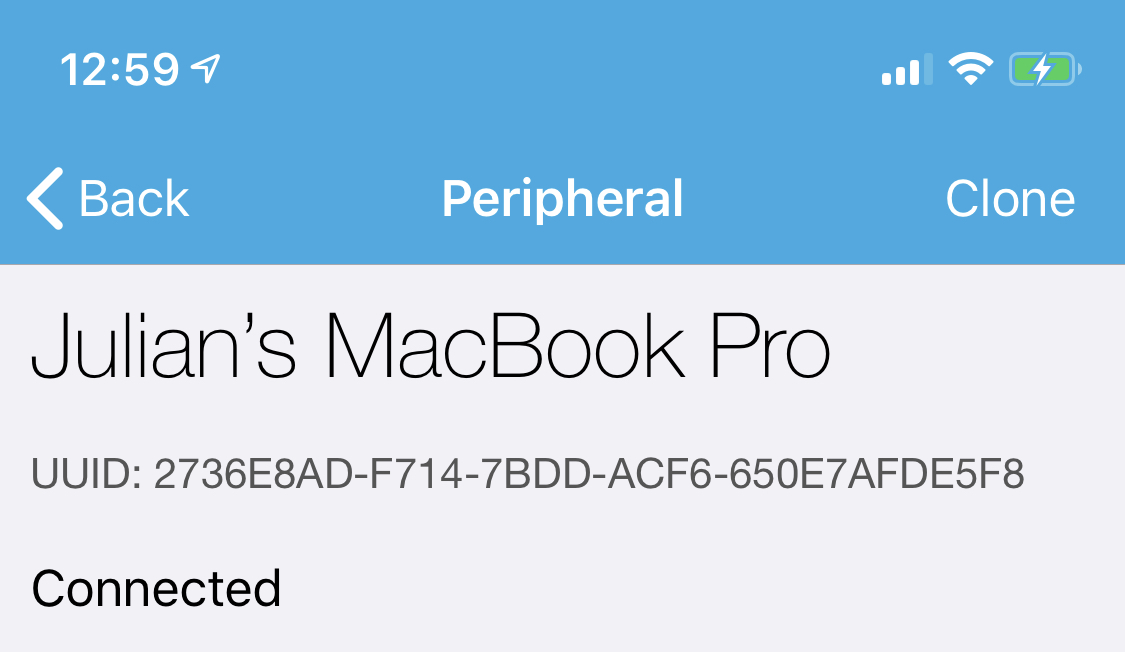
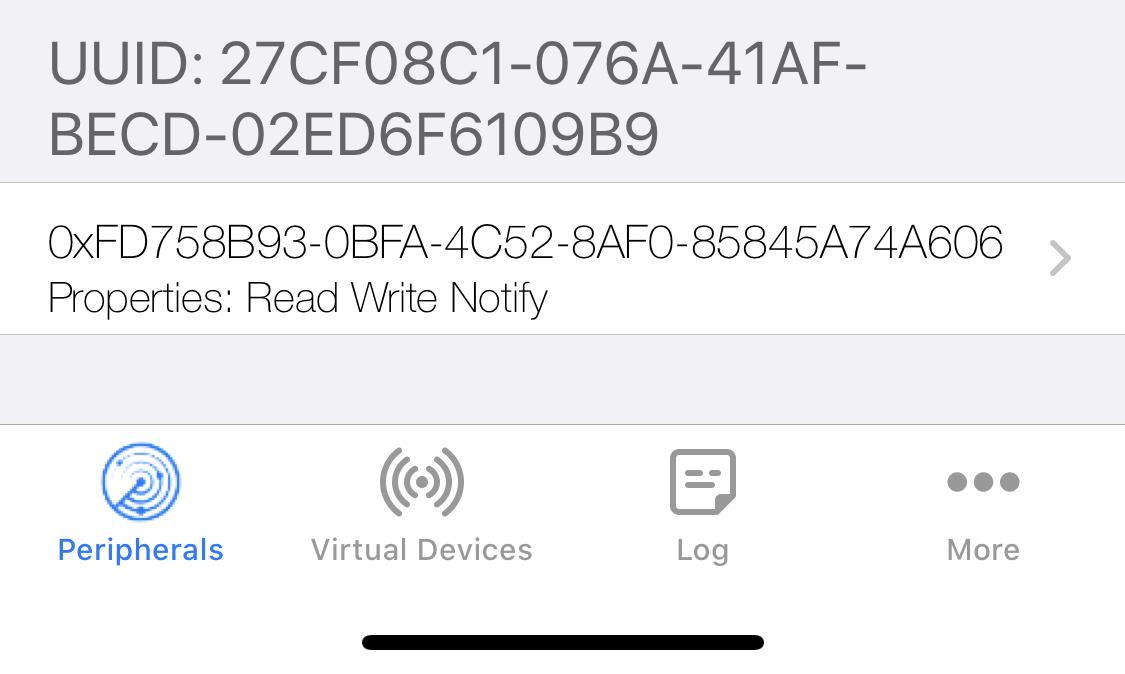
Once you have connected to the peripheral, you’ll see a new page with some details. Verify at the top that the UUID matches the one we defined for our service as the BlenoPrimaryService in service.js. In my example code, I used 27cf08c1-076a-41af-becd-02ed6f6109b9.
Next, scroll to the bottom of this page. There will be a list of some available services offered by this peripheral. At the bottom, you should see the UUID of our service, along with the UUID of the characteristic we defined in characteristic.js. In my example, we used`fd758b93-0bfa-4c52-8af0-85845a74a606. You should also see the available properties listed here- in my example, we defined read, write, and notify properties.
Now, tap on that characteristic cell.
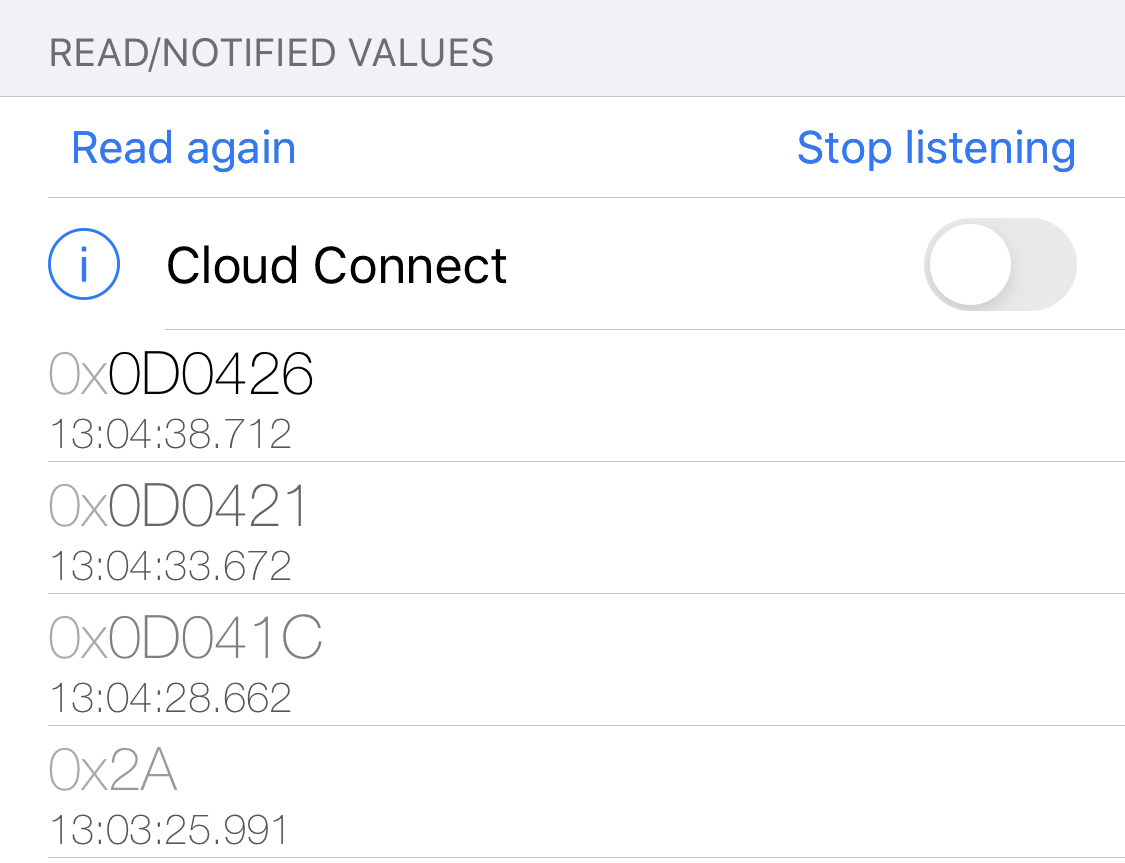
It will load a characteristic detail view. On this view, you will see the characteristic UUID across the top, and below that is a “READ/NOTIFIED VALUES” section. At the bottom of that section is a cell that reads 0x2A. This is the hex value for the number 42- the value we specified in our read handler of characteristic.js.
When this view loads, it automatically performs an initial read. To perform additional reads, you can tap the blue text that says “Read again.” You’ll see additional value cells appear with 0x2A along with time stamps of when the read was performed. If you watch the terminal where you are running the bleno service, you’ll see some logging output indicating a read was performed.
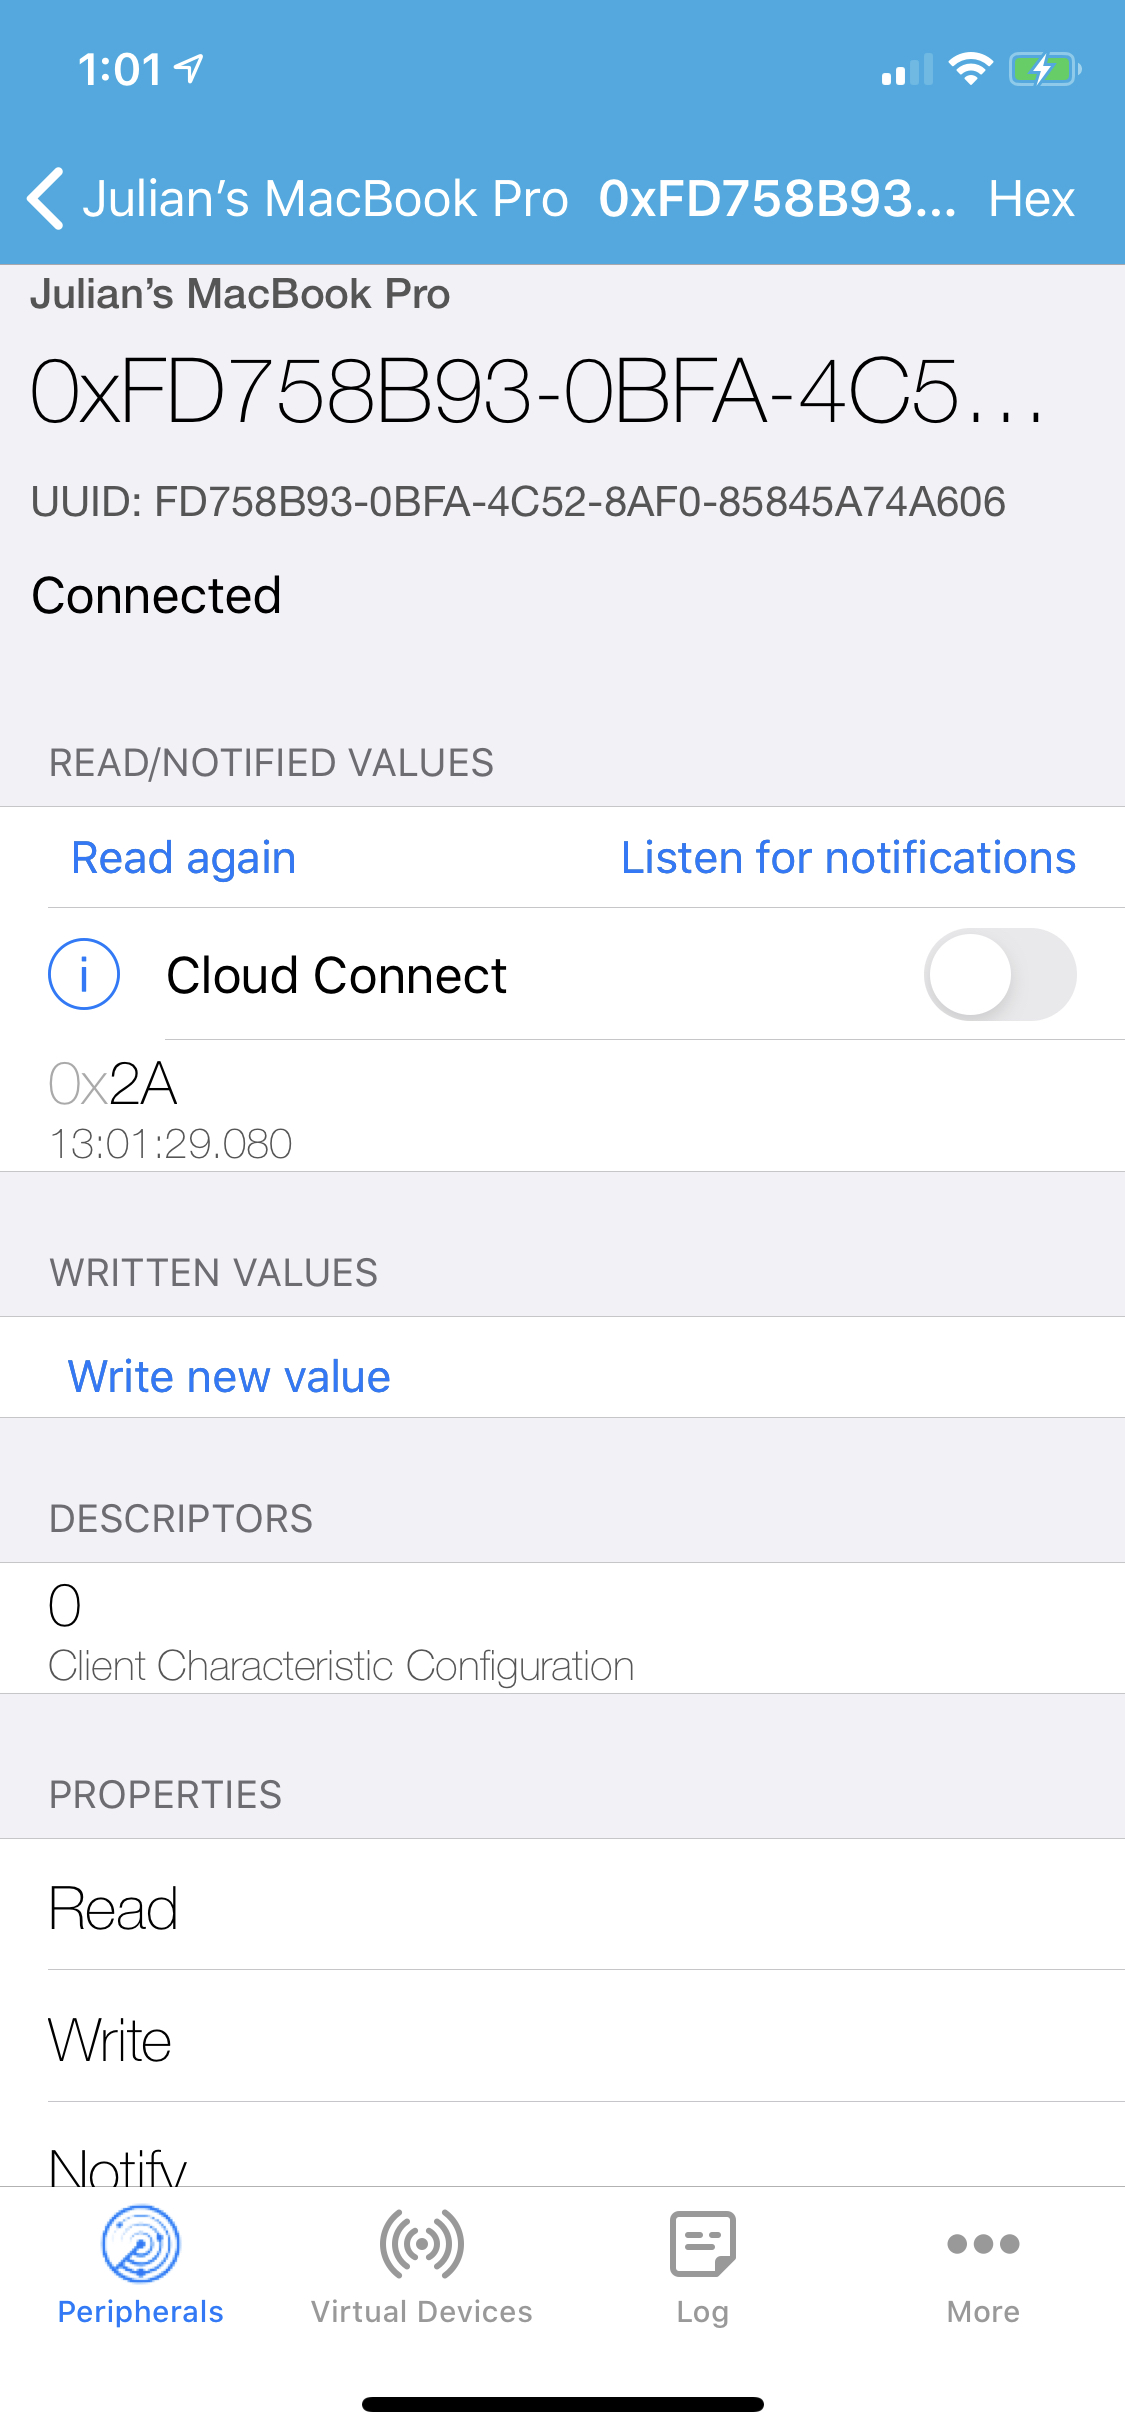
Below the “READ/NOTIFIED VALUES” section is another section with the title “WRITTEN VALUES”. If you tap on the “Write new value” text, it will load a new view with a hex keyboard. From here, you can enter a value to write to our characteristic.
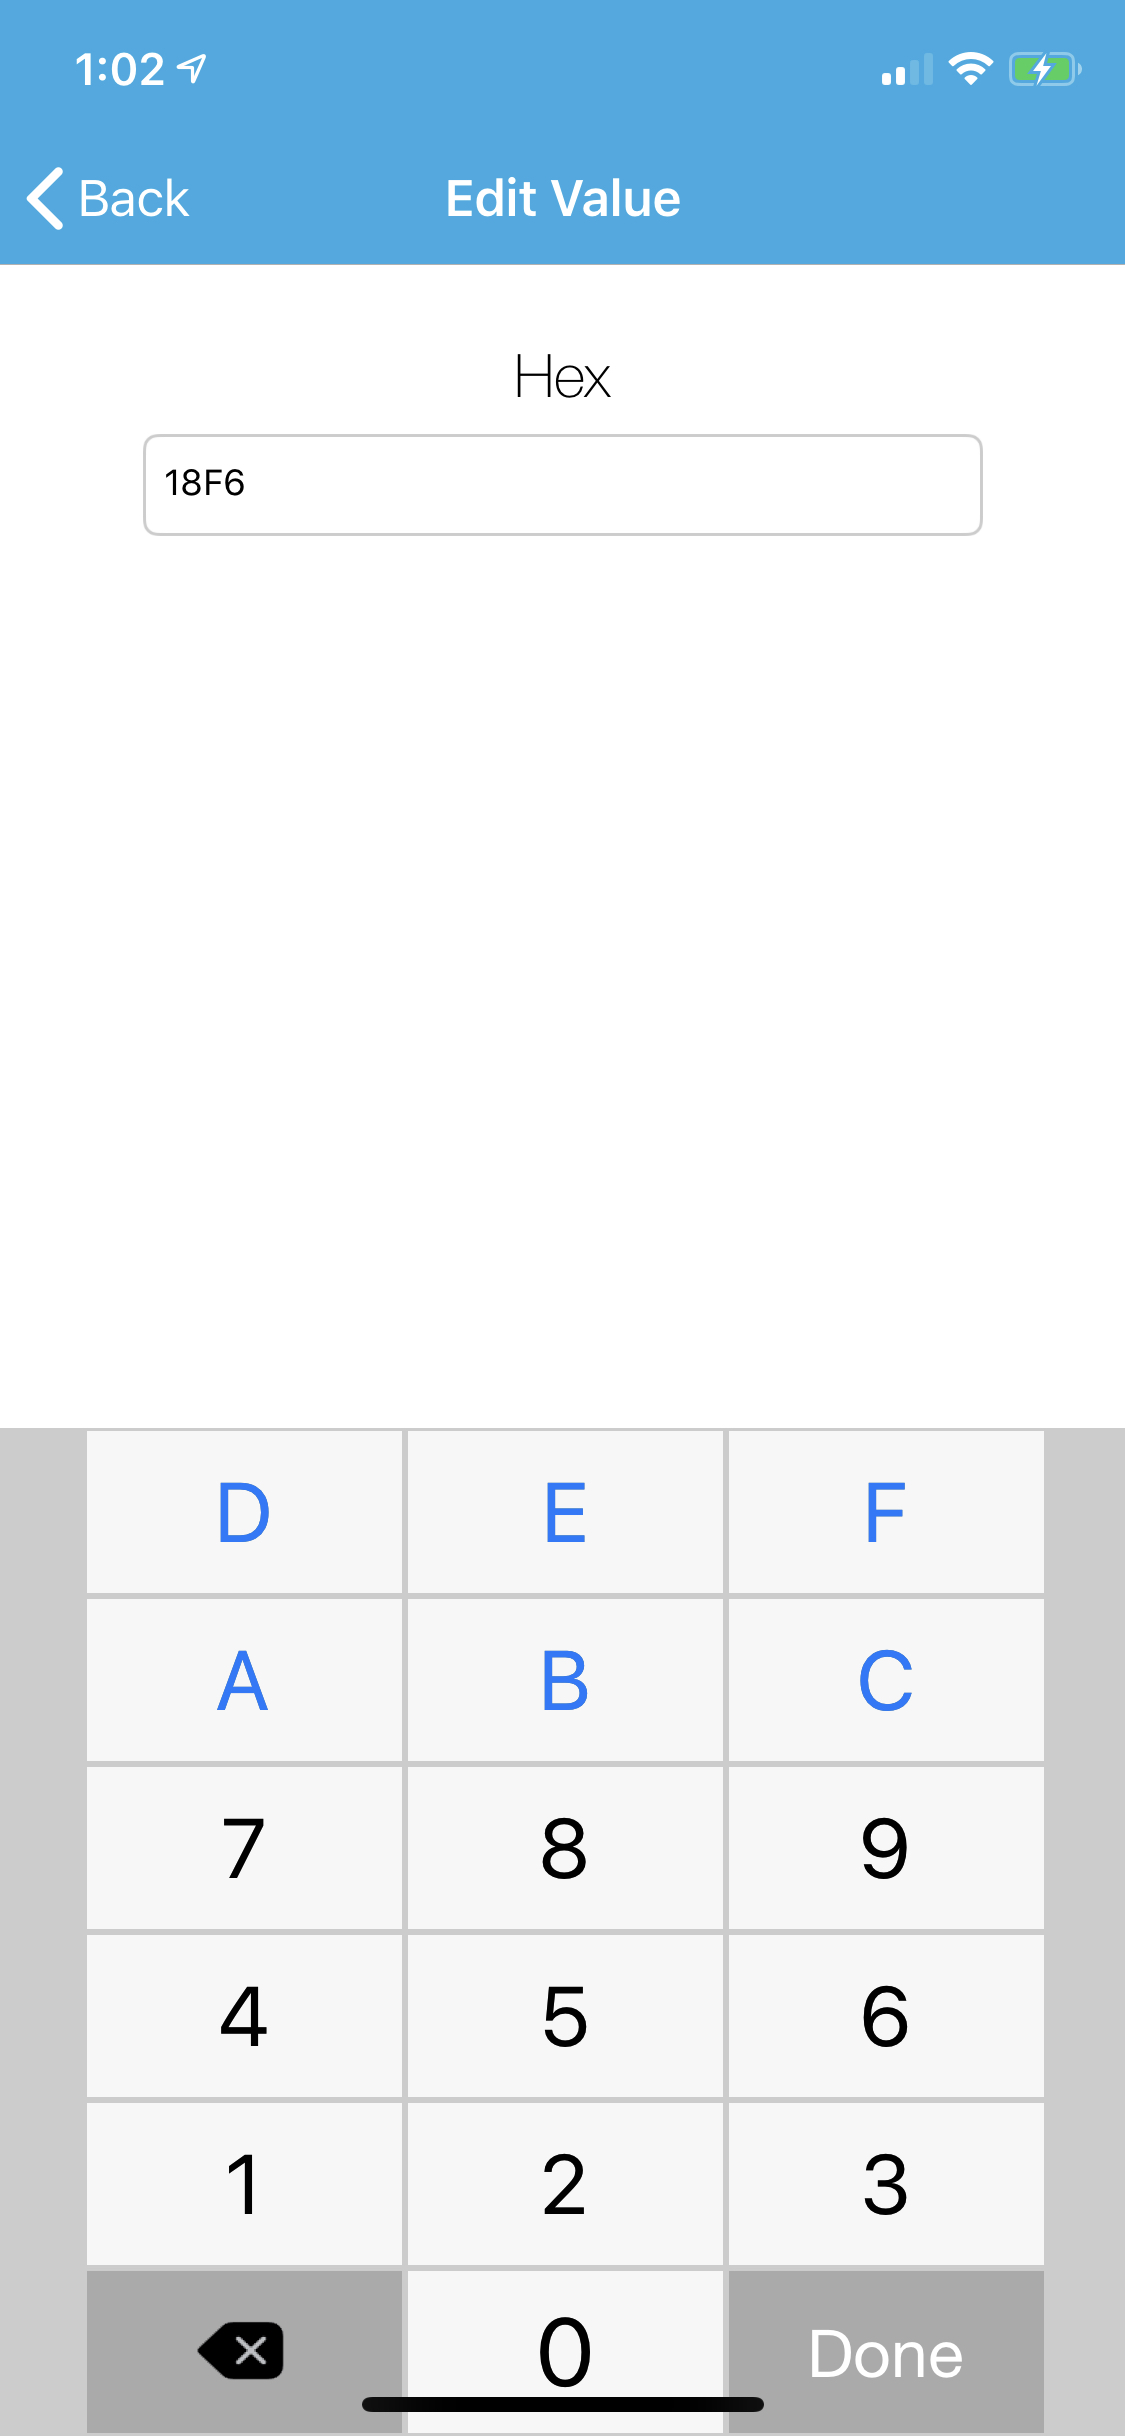
After entering a value, tap “Done”.
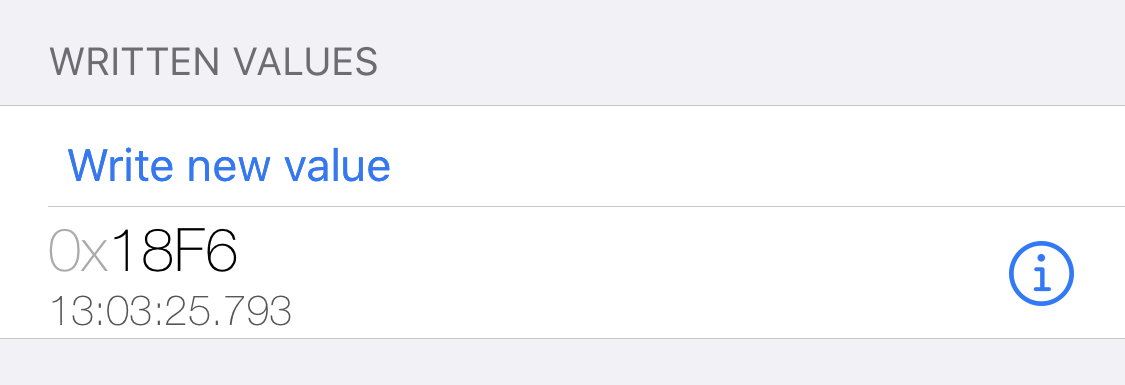
Now you will see the value that was entered in a new cell below “Write new value” along with a timestamp of when the write occurred. Checking back to the terminal where bleno is running, you’ll see a log output along with the value that was written. In my example here, it was 18F6.
The last item to test is the “notify” property. Tap on the “Listen for notifications” button. After every 5 seconds (or whatever amount you specified for notifyInterval), you’ll see a new cell appear. The value will be 3 bytes, representing the hours, minutes, and seconds of the time at which the notification was sent. Tap “Stop listening” to unsubscribe from notifications. You can also see some logging in the terminal window running bleno indicating the subscribe / unsubscribe handlers have fired.
With that, we have successfully verified our custom BLE peripheral!
Final Thoughts
After finishing this guide, you’ll have successfully set up a custom BLE peripheral that supports the read, write, and notify properties using Node.js and bleno. This can be a handy tool for a mobile developer working on a BLE device implementation — whether you need to work on integrating support for a new device that hasn’t been manufactured yet, or you’re assisting with the process of defining what a service or characteristic should look like, getting a usable implementation up and running in minutes can help you move quickly through the mobile software development process.
Check out this GitHub gist to see all the code used in this example together in one spot.