
Writing apps for Android devices can often be challenging enough as it is. Having to deal with different USB cables (or cables that don’t work) just adds to the struggle. It wasn’t until recently that I found you could avoid a lot of cable issues by using Android Debug Bridge (ADB) to talk to devices wirelessly. I was a little shocked that I had not known about this ADB secret. Better late than never, I suppose.
In this post, I’ll show you how to program multiple Android devices without wires.
Getting Started
Let’s start by adding Android Debug Bridge to PATH (if you don’t already have it). On OSX, you can add it to your bash_profile by running:
$ echo 'export PATH=$PATH:/Users/<username>/Library/Android/sdk/platform-tools/' >> .bash_profileBe sure to replace <username> with your actual username.
Reload the file:
$ source .bash_profileYou can test whether it’s working by running:
$ adb versionYou should see something like this:

Now, let’s add our Android device to ADB.
How to Add an Android Device to Android Debug Bridge (ADB)
Step 1
Make sure that the device you want to program wirelessly is connected to the same WIFI network as your computer.
Step 2
Connect the device to your computer with a USB cable. We have to initially connect with a cable to configure ADB.
Step 3
Get the IP address of the Android device. (Settings → About Phone → Status → IP Address)

Step 4
Next, run the following commands:
```
$ adb -d tcpip 5555
$ adb connect <device ip address>:5555
```
The output should say:
$ connected to <device ip address>:5555If the terminal hangs after you run this command, try changing the default USB configuration (in Developer Options) to “USB tethering.”
Step 5
Done! You can see the added device by running `$ adb devices`. The device will show up in Android Studio, and you’ll be able to program the device, view logs, grab screen captures and all the good stuff without any wires!
Adding More Devices
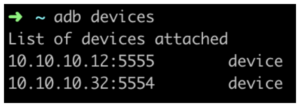
Before you throw away your USB cable, you could add other Android devices that you’ll want to program. Follow the same steps as before. On step 4, just use another port number (like 5554 if it’s available). Ensure both devices are set up by running `$ adb devices`:
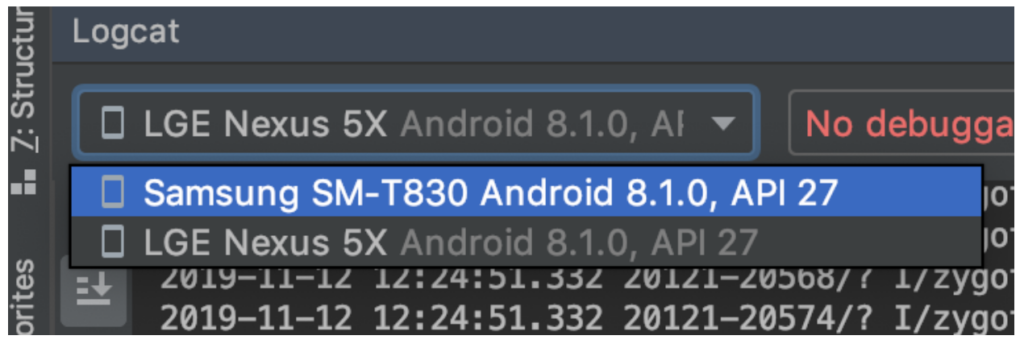
Both devices will also show up in Android Studio:
I’ve noticed that the ADB connection sometimes gets lost. When that happens, you can just run `adb connect` again. You could even create a shell script that does this and just execute that if you need to reconnect. If that doesn’t work, you can try running `adb kill-server` and start over.
If you didn’t already know about this feature, I’m sure this will make Android programming a lot easier. I’ve heard rumors that Android 11 may bring a native wireless ADB implementation. Let’s wait and see!